Implementing a search feature has become hugely important for every web app that values user experience, as users can search for what they need to see without scrolling endlessly.
In this tutorial, we will build a movie application leveraging MongoDB Atlas Search with Laravel (a leading PHP framework) to build a rich text-based search feature that allows users to search for movies by typing a few letters.
Why use MongoDB Atlas Search?
MongoDB's flexible schema, Atlas Search, and powerful querying capabilities, combined with Laravel's expressive syntax, enable us to implement advanced search functionalities quickly.
The source of this application can be found on GitHub.
Prerequisites
Set up database
To set up our MongoDB environment, create a database cluster, set database access, and get the database connection string, we must follow the below instructions from the MongoDB official documentation.
- Sign up for a free MongoDB account.
- Create a cluster.
- Add a database user
- Configure a network connection.
Identify a database to work with
Once we have our cluster set up, we need to load some sample data, we will work with this implementation and get our connection string.
Your connection string should look like this:
mongodb+srv://user:password@cluster0.xxxxx.mongodb.netIf you complete the above steps, the sample data should be loaded in your cluster. Otherwise, check out the documentation on how to load sample data.
After successfully loading the data, we should have a database called sample_mflix within our cluster. We will work with the movies collection in the database.
Laravel and MongoDB packages installation and environment setup
With the database set up, let’s create the Laravel project with Composer. To continue, you want to make sure you have PHP, Laravel, Node, npm, Composer, and finally, the MongoDB PHP extension all properly set up. The following links will come in handy.
- Official PHP installation instructions
- Official Laravel installation instructions
- Install Composer
- The official MongoDB PHP extension
- Install Node and npm
Check out the instructions for the MongoDB and Laravel integration. They explain how to configure a Laravel-MongoDB development environment. We'll cover the Laravel application creation and the MongoDB configuration below.
Create a Laravel project
With our development environment working, to create a Laravel project, we will use Composer. Run the below code in the term in your preferred directory.
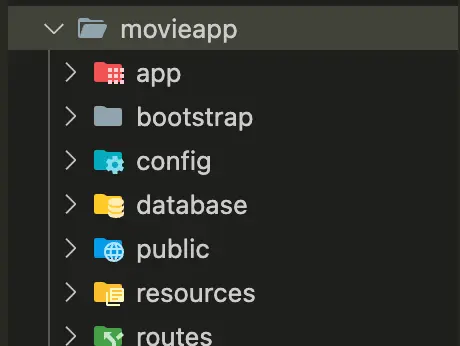
composer create-project laravel/laravel movieappThis command will create a new Laravel project in the folder movieapp. After completing installation, your folder structure should look as below.
From the terminal, run the below code to start the server:
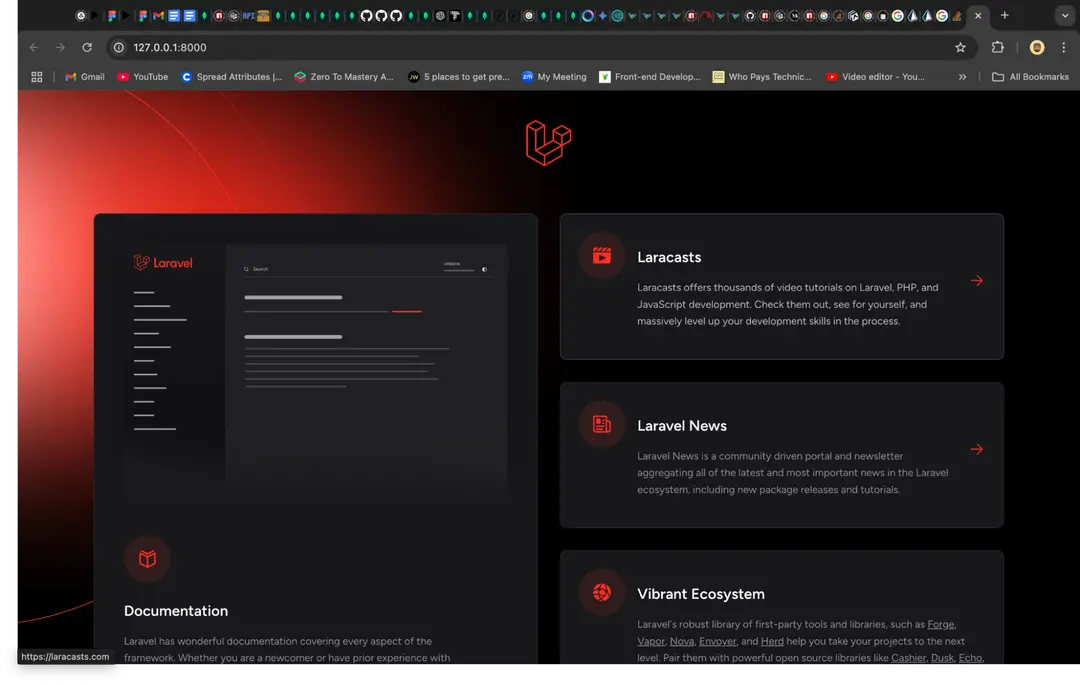
cd movieappphp artisan serveOnce the server is running, it should be available at http://localhost:8000/. You should see the Laravel starter page, as shown below.
 Also, in a new terminal window, run the below command to start the front-end server.
npm installnpm run devWith our server up and running, let's connect to our MongoDB cluster.
Connect the Laravel server to MongoDB
To connect the server to the MongoDB cluster we created earlier, follow as below:
- Firstly, Composer lets you add the Laravel MongoDB package to the application. In the command prompt, go to the project's directory and run the command below.
composer require mongodb/laravel-mongodbthis will add the MongoDB package to the vendor directory
- Let us use Composer to add another package called
mongodb/builder. We will be using this to build an aggregation pipeline later in this guide. Run the below command to addmongodb/builder.
composer require mongodb/builder:^0.2- Navigate to the
.env. Let’s update theDB_CONNECTIONvalue and add aDB_URIas below:
DB_CONNECTION=mongodbDB_URI=mongodb_connection_string_hereUpdate the text mongodb_connection_string_here with your database connection string.
- Navigate to the
config/database.phpfile and update theconnectionsarray as below:
'connections' => [ 'mongodb' => [ 'driver' => 'mongodb', 'dsn' => env('DB_URI'), 'database' => 'sample_mflix', ],- Still on the
config/database.phpfile, update thedefaultstring as:
'default' => env('DB_CONNECTION'),This is to set MongoDB as the default connection for the application. With these variables updated, we should be able to connect to MongoDB successfully,
Let's create a route in the /routes/web.php:
<?phpuse Illuminate\Support\Facades\Route;// Import the Request classuse Illuminate\Http\Request;// Import the DB facadeuse Illuminate\Support\Facades\DB; Route::get('/', function () { return view('welcome');}); //add ping routeRoute::get('/connect', function (Request $request) { $connection = DB::connection('mongodb'); $msg = 'MongoDB is accessible!'; try { $connection->getMongoClient() ->selectDatabase($connection->getDatabaseName()) ->command(['ping' => 1]); } catch (\Exception $e) { $msg = 'MongoDB is not accessible. Error: ' . $e->getMessage(); } return response()->json(['msg' => $msg]);});In the terminal, run php artisan route.
You should see the route in the list. In the browser, navigate to http://localhost:8000/connect/. You should see a success message {"msg":"MongoDB is accessible!"}.
Create a movie model (MongoDB Eloquent model)
Let's create an Eloquent model for our MongoDB database named "Movie" since we will be working with a collection named movies. By convention, the "snake case," plural name of the class, will be used as the collection name unless another name is explicitly specified. So, in this case, Eloquent will assume the Movie model stores documents in the movies collection. Run the command from the project's directory to create the Movie model.
php artisan make:model MovieOnce the command has finished running, it will create /app/Models/Movie.php. Open the file and update as below:
<?phpnamespace App\Models; use MongoDB\Laravel\Eloquent\Model; class Movie extends Model{ protected $connection = 'mongodb';}With the model created, let's display some of the movies on our home page.
To do this, update the /routes/web.php:
<?phpuse Illuminate\Support\Facades\Route;use App\Models\Movie; Route::get('/', function () { $movies = Movie::limit(20)->get(); // Retrieve only 20 movies return view('welcome', [ 'movies' => $movies ]);});Then, update the body tag of app/resources/views/welcome.blade.php, as below.
<body class="font-sans antialiased dark:bg-black dark:text-white/50"> <div class="bg-gray-50 text-black/50 dark:bg-black dark:text-white/50"> <img id="background" class="absolute -left-20 top-0 max-w-[877px]" src="https://laravel.com/assets/img/welcome/background.svg" alt="Laravel background" /> <div class="relative min-h-screen flex flex-col items-center justify-center selection:bg-[#FF2D20] selection:text-white"> <div class="relative w-full max-w-2xl px-6 lg:max-w-7xl"> <div id="movie-list" class=' w-full flex gap-6 justify-around items-center flex-wrap'> </div> </div> </div> <script> let movies = @json($movies); displayMovies(movies) function displayMovies(movies) { const movieListDiv = document.getElementById('movie-list'); movieListDiv.innerHTML = movies.map(movie => ` <div class="movie-card max-w-sm bg-green-500 border border-gray-200 rounded-lg shadow dark:bg-gray-800 dark:border-gray-700"> <div class="h-[400px]"> <img class="rounded-t-lg object-cover w-full h-full" src="${movie.poster}" alt="${movie.title}" /> </div> <div class="p-5"> <a href="#"> <h5 class="mb-2 text-2xl font-bold tracking-tight text-gray-900 dark:text-white line-clamp-1"> ${movie.title} </h5> </a> <p class="mb-3 font-normal text-gray-700 dark:text-gray-400 line-clamp-2">${movie.plot}</p> <a href="#" class="inline-flex items-center px-3 py-2 text-sm font-medium text-center text-white bg-blue-700 rounded-lg hover:bg-blue-800 focus:ring-4 focus:outline-none focus:ring-blue-300 dark:bg-blue-600 dark:hover:bg-blue-700 dark:focus:ring-blue-800"> See more </a> </div> </div> `).join(''); } </script></body>Refresh your application on http://localhost:8000. You should have a list of movies displayed on the screen, as below.
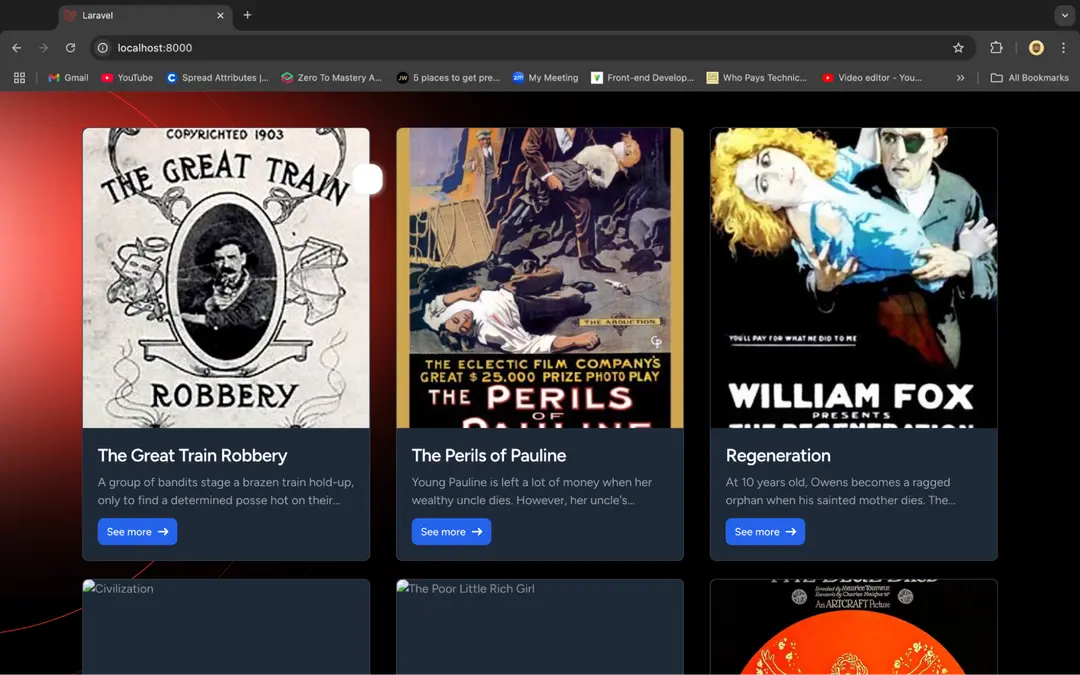
Did you get an error, E11000 duplicate key error collection: sample_mflix.sessions index: user_id_1 dup key: { user_id: null }? In this case, head over to the sessions collection in sample_mflix database, clear the document in it, and try again.
With the application running, let's head over to the MongoDB Atlas dashboard to create an Atlas search index. But before that…
Create an Atlas Search index
To implement the feature such that we can search movies by their title, let’s create a search index from the MongoDB Atlas dashboard.
From the previously created cluster, click on Browse collections, navigate to the Atlas Search tab, and click on Create index on the right side of the search page. On this screen, select JSON editor under Atlas Search, click Next to proceed, add an index name (in our case, movie_search), select the movies collection from the sample_mflix database, and update the JSON editor as below. Click Next.
{ "mappings": { "dynamic": false, "fields": { "title": { "type": "string" } } }}
Create an Atlas Search autocomplete index
Next, let's add another search index, but this time, the type will be autocomplete. We will use it to implement a feature such that when a user types in the input box, it will suggest possible movie titles.
Create another index, give it a name (in our case, movie_title_autocomplete), and update the JSON editor, as below:

{ "mappings": { "dynamic": false, "fields": { "title": { "type": "autocomplete" } } }}Create search routes API endpoint with Laravel's Eloquent
Let’s create two functions called searchByTitle and autocompleteByTitle within the Movie model class. These functions will implement the search and the autocomplete features, respectively.
Therefore, let’s update the app/Models/Movie.php file as below.
<?phpnamespace App\Models; use Illuminate\Support\Collection;use MongoDB\Laravel\Eloquent\Model; class Movie extends Model{ protected $connection = 'mongodb'; public static function searchByTitle(string $input): Collection { return self::aggregate() ->search([ 'index' => 'movie_search', 'compound' => [ 'must' => [ [ 'text' => [ 'query' => $input, 'path' => 'title', 'fuzzy' => ['maxEdits' => 2] // Adding fuzzy matching ] ] ] ] ]) ->limit(20) ->project(title: 1, genres: 1, poster: 1, rated: 1, plot: 1) ->get(); } public static function autocompleteByTitle(string $input): Collection { return self::aggregate() ->search([ 'index' => 'movie_title_autocomplete', 'autocomplete' => [ 'query' => $input, 'path' => 'title' ], 'highlight' => [ 'path' => ['title'] ] ]) ->limit(5) // Limit the result to 5 ->project(title: 1, highlights: ['$meta' => 'searchHighlights']) ->get(); }}Note: Putting the code that makes the search query in the model class separates the data access layer from the http controllers. This makes the code more testable.
Let’s create a controller to implement the search API in the project. Let's run the code below to create a controller.
php artisan make:controller SearchControllerThis command will create an app/Http/Controllers/SearchController.php file. Let's update the file as below.
<?phpnamespace App\Http\Controllers; use App\Models\Movie;use Illuminate\Http\JsonResponse; class SearchController extends Controller{ public function search($search): JsonResponse { // Define the aggregation based on the search conditions if (!empty($search)) { $items = Movie::searchByTitle($search); return response()->json($items, 200); } return response()->json(['error' => 'conditions not met'], 400); }}Next, let's create an API route.
Navigate to app/routes/web.php:
// import the SearchControlleruse App\Http\Controllers\SearchController; Route::get('/search/{search}', [SearchController::class, 'search']);Test the API by calling it, like so:
http://localhost:8000/search/moving train
Create autocomplete routes API endpoint with Laravel's Eloquent
Navigate to the app/Http/Controllers/SearchController.php file and add the below function after the end of the search function.
public function autocomplete($param): JsonResponse{ try { $results = Movie::autocompleteByTitle($param); return response()->json($results, 200); } catch (\Exception $e) { return response()->json(['error' => $e->getMessage()], 500); }}Next, let's create an API route. Navigate to app/routes/web.php.
Route::get('/autocomplete/{param}', [SearchController::class, 'autocomplete']);Test the API by calling it like so:
http://localhost:8000/autocomplete/helloImplement autocomplete in our front-end application
To see these implements in action, let's update the body tag of the app/resources/views/welcome.blade.php as below.
Get the complete code snippet on GitHub.
<body class="font-sans antialiased dark:bg-black dark:text-white/50"> <script> let debounceTimer; let movies = @json($movies); displayMovies(movies) function handleSearch(event) { const query = event.target.value; // Clear the previous debounce timer clearTimeout(debounceTimer); // Set up a new debounce timer debounceTimer = setTimeout(() => { if (query.length > 2) { // Only search when input is more than 2 characters titleAutocomplete(query); } }, 300); } async function titleAutocomplete(query) { try { const response = await fetch(`/autocomplete/${encodeURIComponent(query)}`); const movies = await response.json(); displayResults(movies); } catch (error) { console.error('Error fetching movies:', error); } } async function fetchMovies(query) { try { const response = await fetch(`/search/${encodeURIComponent(query)}`); const movies = await response.json(); displayMovies(movies); displayResults([]) } catch (error) { console.error('Error fetching movies:', error); } } function displayResults(movies) { const resultsDiv = document.getElementById('search-results'); resultsDiv.innerHTML = movies.map(movie => ` <div onclick="fetchMovies('${movie.title}')" class='select-none text-gray-600 cursor-pointer flex items-center gap-[10px]'> <div> ${movie.title} </div> </div>`).join(''); } function displayMovies(movies) { const movieListDiv = document.getElementById('movie-list'); movieListDiv.innerHTML = movies.map(movie => ` <div class="movie-card max-w-sm bg-green-500 border border-gray-200 rounded-lg shadow dark:bg-gray-800 dark:border-gray-700"> <div class="h-[400px]"> <img class="rounded-t-lg object-cover w-full h-full" src="${movie.poster}" alt="${movie.title}" /> </div> <div class="p-5"> <a href="#"> <h5 class="mb-2 text-2xl font-bold tracking-tight text-gray-900 dark:text-white line-clamp-1"> ${movie.title} </h5> </a> <p class="mb-3 font-normal text-gray-700 dark:text-gray-400 line-clamp-2">${movie.plot}</p> <a href="#" class="inline-flex items-center px-3 py-2 text-sm font-medium text-center text-white bg-blue-700 rounded-lg hover:bg-blue-800 focus:ring-4 focus:outline-none focus:ring-blue-300 dark:bg-blue-600 dark:hover:bg-blue-700 dark:focus:ring-blue-800"> See more <svg class="rtl:rotate-180 w-3.5 h-3.5 ms-2" aria-hidden="true" xmlns="http://www.w3.org/2000/svg" fill="none" viewBox="0 0 14 10"> <path stroke="currentColor" stroke-linecap="round" stroke-linejoin="round" stroke-width="2" d="M1 5h12m0 0L9 1m4 4L9 9" /> </svg> </a> </div> </div> `).join(''); } </script></body>In the above changes:
- We added a function called
displayMovies, which takes movies as an argument. It will render movie cards to the screen based on the movies list. - Then, we have a function called
handleSearchwhich is an oninput event handler for the search input box. - Within the
handleSearchfunction, we have a function calledtitleAutocomplete, which fetches and displays data from the autocomplete API endpoint. - Then, we have the
fetchMoviesfunction, which fetches data from the search API endpoint within which we call the displayMovies function to display the movie’s response for the API.
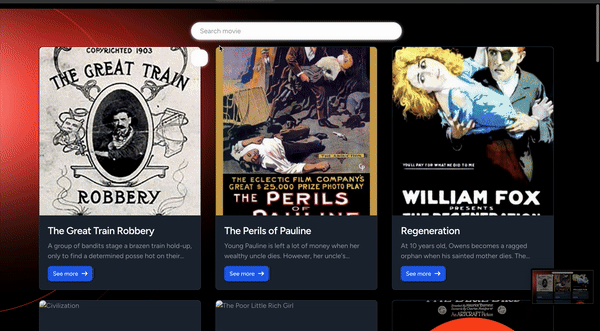
With all these changes made, head over to http://localhost:8000/ to test, as shown below.
Conclusion
It is crucial to make it easy for your users to find what they are looking for on a website to have a great user experience. In this guide, I showed you how I created a text search for a movie application with MongoDB Atlas Search. This search will allow users to search for movies by their title.
Atlas Search is a full-text search engine that enables developers to implement rich search functionality into their applications. It allows users to search large quantities of data quickly and efficiently.
Learn more about MongoDB Atlas Search and using PHP with MongoDB.

MongoDB Creator || Software engineer || JavaScript || TypeScript || Technical writer || AWS