We are going to finish the last part of basic CRUD: creating new users. You have all the tools you need from the previous topics we’ve covered thus far, so feel free to try to work on creating users and comparing this article to your efforts.
If you need to catch up, we left off in Part 5 with the ability to delete users and how to redirect users after successful deletion. We also looked at extracting our HTTP client to a dedicated module for reuse across the application. As a reminder, this tutorial isn’t focused on permissions; we are using the built-in Laravel users table to demonstrate working with CRUD within the context of a Vue Router project.
Here’s the series outline thus far:
- Setting up the Project and Vue Router – Part 1
- Loading Async Data in Vue Router – Part 2
- Adding Real API Endpoints in Laravel – Part 3
- Editing Existing Users – Part 4
- Deleting Users – Part 5
Adding the Create Users Component
First up, we’re going to create and configure the frontend component for creating new users. The UsersCreate.vue component is similar to the UsersEdit.vue component we created in Part 4:
<template> <div> <h1>Create a User</h1> <div v-if="message" class="alert">{{ message }}</div> <form @submit.prevent="onSubmit($event)"> <div class="form-group"> <label for="user_name">Name</label> <input id="user_name" v-model="user.name" /> </div> <div class="form-group"> <label for="user_email">Email</label> <input id="user_email" type="email" v-model="user.email" /> </div> <div class="form-group"> <label for="user_password">Password</label> <input id="user_password" type="password" v-model="user.password" /> </div> <div class="form-group"> <button type="submit" :disabled="saving"> {{ saving ? 'Creating...' : 'Create' }} </button> </div> </form> </div></template><script> import api from '../api/users'; export default { data() { return { saving: false, message: false, user: { name: '', email: '', password: '', } } }, methods: { onSubmit($event) { this.saving = true this.message = false } } }</script><style lang="scss" scoped>$red: lighten(red, 30%);$darkRed: darken($red, 50%); .form-group { margin-bottom: 1em; label { display: block; }}.alert { background: $red; color: $darkRed; padding: 1rem; margin-bottom: 1rem; width: 50%; border: 1px solid $darkRed; border-radius: 5px;}</style>We added the form and inputs and stubbed out an onSubmit method. The rest of the component is identical to the UsersEdit component, except for the addition of the password input. A password is required to create a new user. We skipped having a password field when editing a user because typically, you have a specific password change flow that is separate from editing a user.
Note that we could spend some time extracting the form in both the create and edit views to a dedicated component, but we will leave that for another time (or feel free to work on that independently). The only difference is populating the form with existing user data (including user ID) vs. an empty form for creating users.
Configuring the Route
Next, we need to configure the Vue route and link to the page so we can navigate to the user creation screen. Open the resources/assets/js/app.js file and add the following route (and import):
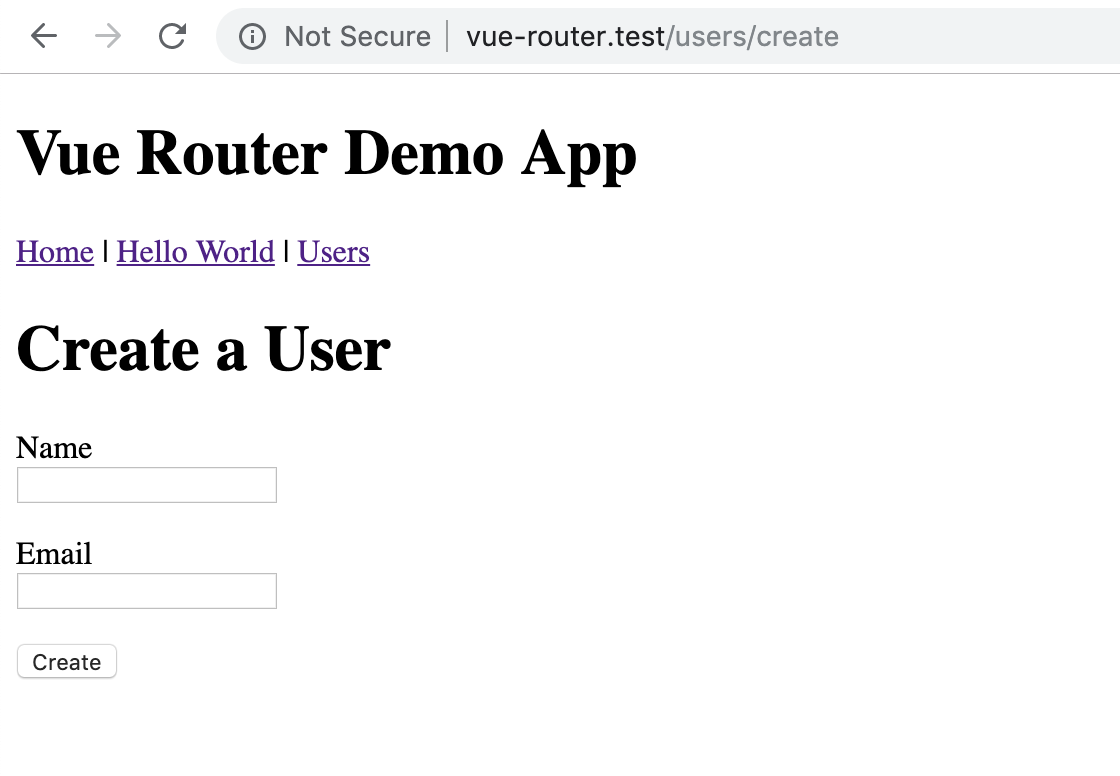
import UsersCreate from './views/UsersCreate'; // ... const router = new VueRouter({ mode: 'history', routes: [ // ... { path: '/users/create', name: 'users.create', component: UsersCreate, }, { path: '/404', name: '404', component: NotFound }, { path: '*', redirect: '/404' }, ],});Next, let’s add the link to the new component in the assets/js/views/UsersIndex.vue component:
<template> <div class="users"> <!-- ... --> <div> <router-link :to="{ name: 'users.create' }">Add User</router-link> </div> </div></template>You should now be able to recompile your frontend assets with yarn watch and see the following:
Submitting the Form
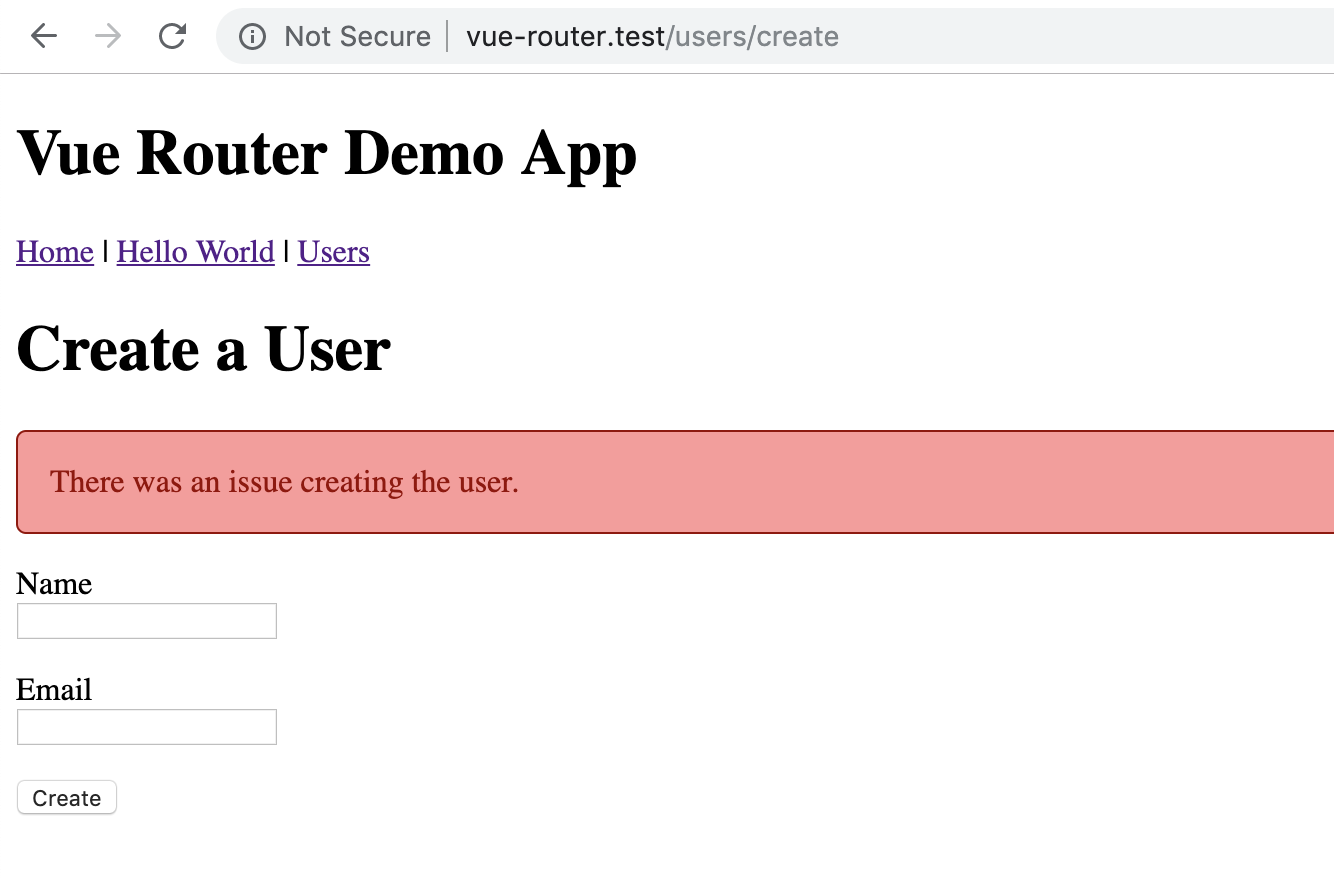
At this point, we don’t have a backend route, so submitting the form via the API client will return a 405 Method Not Allowed. Let’s wire up the onSubmit() handler in the UsersCreate component without defining the route, which will allow us to see the error state of submitting the form quickly:
methods: { onSubmit($event) { this.saving = true this.message = false api.create(this.user) .then((data) => { console.log(data); }) .catch((e) => { this.message = e.response.data.message || 'There was an issue creating the user.'; }) .then(() => this.saving = false) }}Our form logs out the response data at this point, catches errors and then finally toggles saving = false to hide the “saving” state. We attempt to read the message property from the response or provide a default error message.
Next, we need to add the create() method to the API module we import in the component located at resources/assets/js/api/users.js:
export default { // ... create(data) { return client.post('users', data); }, // ...};The form will send a POST request to the UsersController via the client. If you submit the form, you will see an error message with a 405 response error in the console:
Adding the API Endpoint
We are ready to add the API endpoint in Laravel for creating a new user. It will be similar to editing an existing user. However, this response will return a 201 Created status code.
We will start by defining the route for storing a new user via the API:
// routes/api.phpRoute::namespace('Api')->group(function () { // ... Route::post('/users', 'UsersController@store');});Next, open up the app/Http/Controllers/UsersController.php file and add store() method:
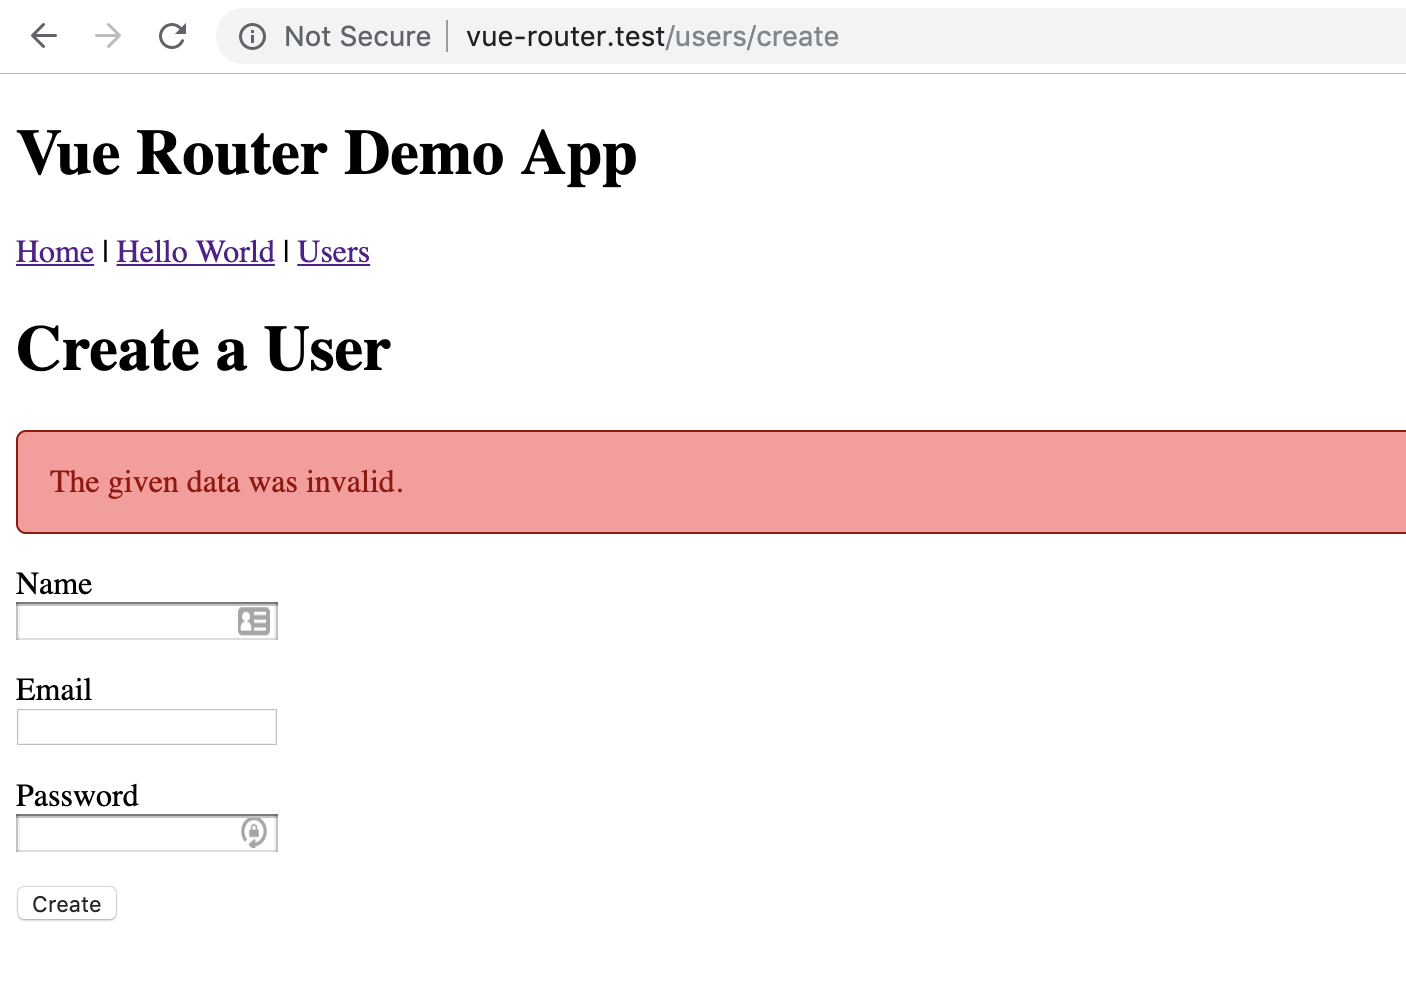
public function store(Request $request){ $data = $request->validate([ 'name' => 'required', 'email' => 'required|unique:users', 'password' => 'required|min:8', ]); return new UserResource(User::create([ 'name' => $data['name'], 'email' => $data['email'], 'password' => bcrypt($data['password']), ]));}When a user is valid, the new user response looks similar to the following when you submit the form:
{ "data": { "id":51, "name":"Paul Redmond", "email":"paul@example.com" }}If you submit invalid data, you will get something similar the following message:
Handing Success
We already handle what happens with a server error or a validation error; let’s finish up by handling a successful user creation. We’ll clear the form and redirect to the user’s edit page:
onSubmit($event) { this.saving = true this.message = false api.create(this.user) .then((response) => { this.$router.push({ name: 'users.edit', params: { id: response.data.data.id } }); }) .catch((e) => { this.message = e.response.data.message || 'There was an issue creating the user.'; }) .then(() => this.saving = false)}Here’s the final UsersCreate.vue component:
<template> <div> <h1>Create a User</h1> <div v-if="message" class="alert">{{ message }}</div> <form @submit.prevent="onSubmit($event)"> <div class="form-group"> <label for="user_name">Name</label> <input id="user_name" v-model="user.name" /> </div> <div class="form-group"> <label for="user_email">Email</label> <input id="user_email" type="email" v-model="user.email" /> </div> <div class="form-group"> <label for="user_password">Password</label> <input id="user_password" type="password" v-model="user.password" /> </div> <div class="form-group"> <button type="submit" :disabled="saving"> {{ saving ? 'Creating...' : 'Create' }} </button> </div> </form> </div></template><script> import api from '../api/users'; export default { data() { return { saving: false, message: false, user: { name: '', email: '', password: '', } } }, methods: { onSubmit($event) { this.saving = true this.message = false api.create(this.user) .then((response) => { this.$router.push({ name: 'users.edit', params: { id: response.data.data.id } }); }) .catch((e) => { this.message = e.response.data.message || 'There was an issue creating the user.'; }) .then(() => this.saving = false) } } }</script><style lang="scss" scoped>$red: lighten(red, 30%);$darkRed: darken($red, 50%); .form-group { margin-bottom: 1em; label { display: block; }}.alert { background: $red; color: $darkRed; padding: 1rem; margin-bottom: 1rem; width: 50%; border: 1px solid $darkRed; border-radius: 5px;}</style>Conclusion
We have a basic working form to create new users that only have basic validation logic. This tutorial walks you through the basics of doing CRUD in Vue.
As homework, you can define a dedicated user form component for rendering a form for creating a new user and editing existing users if you think it’d be valuable reuse. We are okay with the duplication for now but would be good practice for creating reusable components.
I’d also like to emphasize that I stripped out many nice things we could have done, such as using a CSS framework like Bootstrap, etc. I decided to focus on the core aspects of someone that has never worked with Vue Router or building a single page application before. While to some, the tutorial might feel trivial, to beginners, it focuses on some essential concepts that differ from building traditional server-side applications.