In this tutorial we are going to have a detailed look at how you can install Laravel Forge on a custom VPS as well as how to set up SSH keys to ensure a secure connection.
Setup requirements
Based on the Forge documentation, you are going to need the following:
- A VPS server with fresh Ubuntu 20/22 installation
- A server with at least 1 CPU core @ 1Ghz, 1GB RAM & 10GB disk space
- An account on the Forge platform with an active subscription
For this tutorial, we are going to be using a cloud VPS server with Ubuntu 22.04.
Simple installation process
Setting up Laravel Forge on your custom VPS is actually really straight-forward as the installer automatically takes care of the entire process.
Select custom VPS
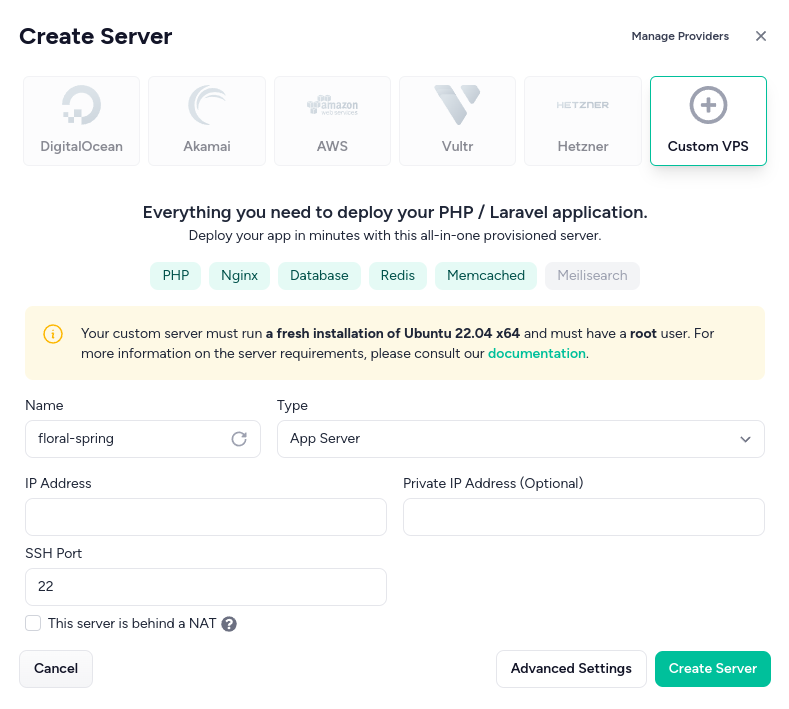
Start by opening up the Forge control panel. Next, click on the Create Server button. You will then see a list of existing providers. From here, select the Custom VPS option as illustrated below:
Choose app server type
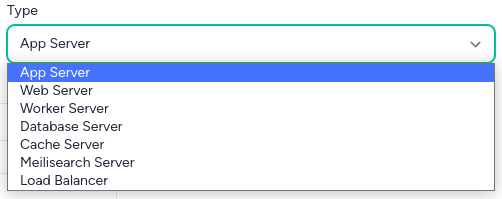
We can now focus on the Type field. The default option - App Server is the perfect choice if you want to effortlessly deploy your Laravel/PHP applications as you get everything (PHP, Nginx, DB server, Redis and Memcached) in one single installation.
If you're uncertain about which server type will suit your needs, you can always choose App server as a good starting point. As your application grows, you can easily scale by adding dedicated servers for specialized services such as databases or data caching. Due to the versatile nature of this option, we are going to be using the App server type.
Enter your server's IP
Finally, you will need to fill in the other fields. Simply enter your server's IP address and leave the other fields with their default values. It is important to remember that you might need to alter some information depending on your hosting provider. However, in most cases, you'd only need to enter your server's IP.
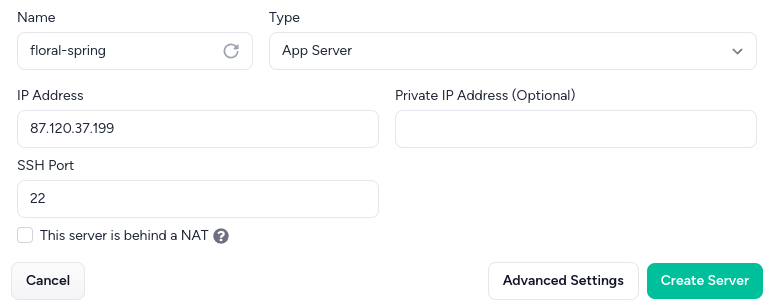
NOTE: If you are installing Forge on Ubuntu 20, make sure to select it from the Advanced Settings menu!
Once you are done, click on Create Server. You will be then given a wget command that you will need to run on your server:
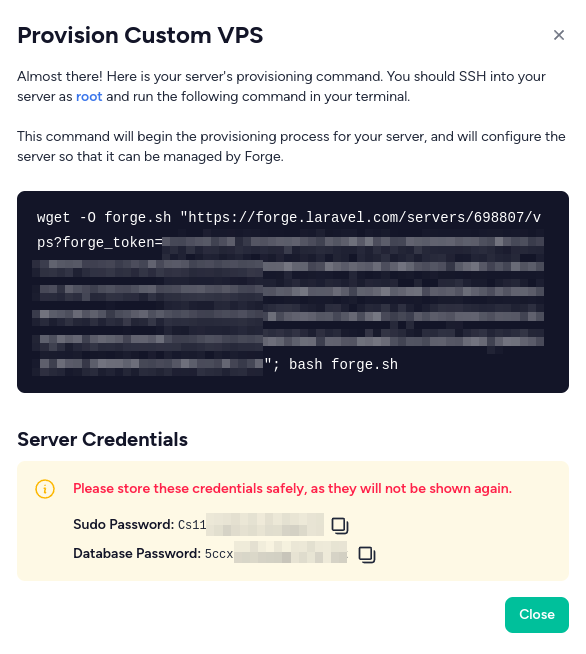
IMPORTANT: Make sure to store the provided server credentials in a secure location before proceeding!
Once you have copied and stored the credentials, you can paste in the command and run it:

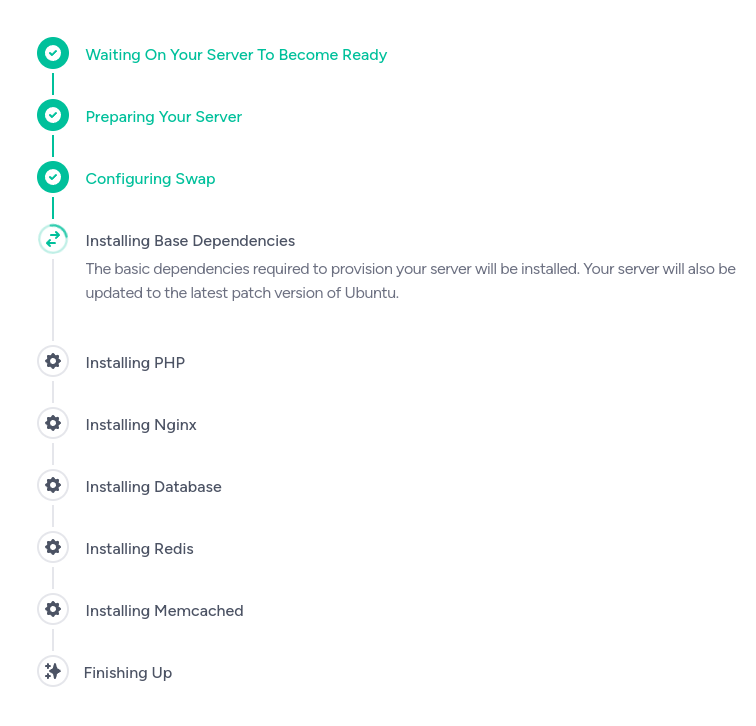
Monitor the installation process
Once you start the command, you will also be able to monitor the installation through the control panel:
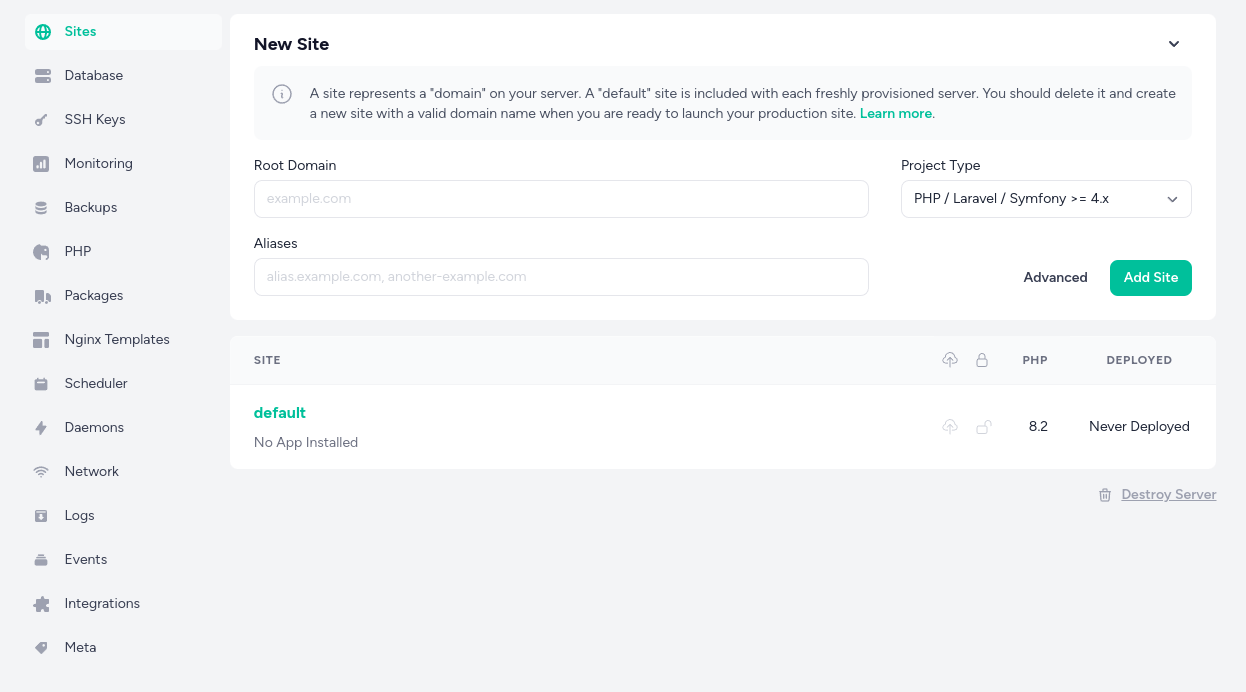
When the installation concludes, a new panel will open, which will contain many different customization options for your VPS:
How to set up SSH access for your server
The Forge installer will automatically take care of your server's security by leaving the 80, 443 & 22 open. Additionally, it also automatically disables password authentication for your server during the installation process. Because of this, you will need to manually create and configure a SSH key pair that you can use to connect to your server.
Create and copy your public SSH Key
Firstly, you'll need to generate an SSH key pair on your local machine. For Windows, you can use an app like PuTTY. As for MacOS or Linux, you can use the built-in terminal.
The SSH key pair consists of a public key and a private key. The public key is what you'll be adding to Laravel Forge and the private key will be stored securely on your local machine.
To create a SSH key pair on Linux/MacOS, open up the terminal and type in the following command:
ssh-keygenOnce you have your keys, make sure to copy your public key - it will be a long string of characters starting with either ssh-rsa or ssh-ed25519.
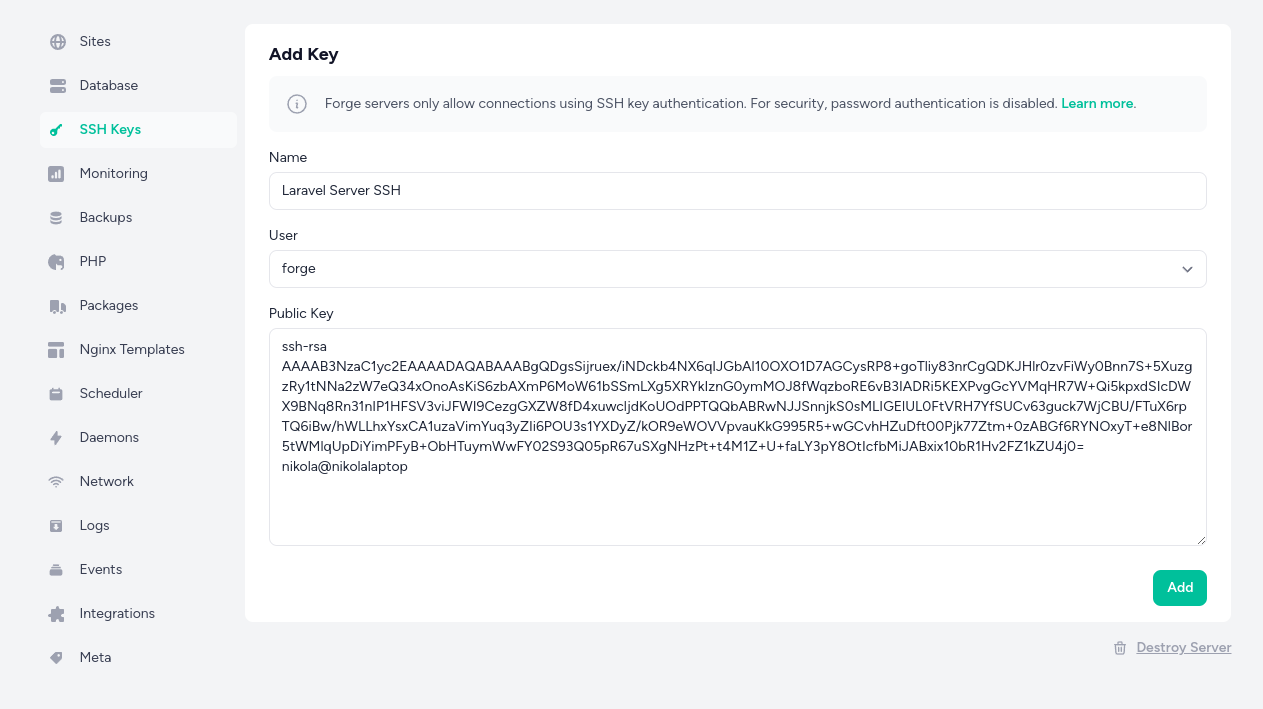
Add the public SSH key to Laravel Forge
Log into Forge and select the server that you want to add the SSH key to from the list that will be shown on your dashboard.
Next, click on the SSH Keys button from the menu on the side. This will take you to the SSH keys management page. From here, click on the Add SSH Key button. Then, you will need to paste in your public SSH key that you previously copied and you will also need to give it a name. Once you're done, click on the Add button to save your settings.
That's it! You've added your SSH key to Laravel Forge. You can now connect to your server from your local machine. Remember to keep your private key safe and secure as it's the only method that you can use to establish a connection to your server.