As web developers, we often have to interact with APIs from our Laravel applications. The Laravel HTTP Client, introduced in version 7, provides a convenient and intuitive wrapper around the Guzzle HTTP library. In this article, we will explore five valuable tricks for working with the Laravel HTTP Client that can make your development experience more efficient and enjoyable.
These tricks include using HTTP macros, configuring the HTTP client for container services, portable base URL configuration, preventing stray requests in tests, and listening to HTTP events. By mastering these tips, you can streamline your API interactions and create more robust and maintainable Laravel applications.
HTTP Macros
Many of Laravel's services have a "macro" feature that allows you to define custom methods for your application. Instead of extending core classes from the Laravel Framework, you can add these macros to a boot() method in a service provider.
The HTTP docs show an example of a macro you could use to define common settings:
public function boot(): void{ Http::macro('github', function () { return Http::withHeaders([ 'X-Example' => 'example', ])->baseUrl('https://github.com'); });} // Usageresponse = Http::github()->get('/');Macros can define any convenience methods you'd like to define and reuse in your application. The documentation example of macros touches on another tip for configuring HTTP clients for use in other services.
We will revisit combining macros with passing clients to other container services in the next section.
Configure the HTTP Client for Container Services
When interacting with APIs from a Laravel application, you'll likely want various configurable settings for the client. For example, if the API has multiple environments, you'll want a configurable base URL, token, timeout settings, and more.
We can leverage a macro to define the client, represent a client as its own service we can, inject in other services, or a bit of both.
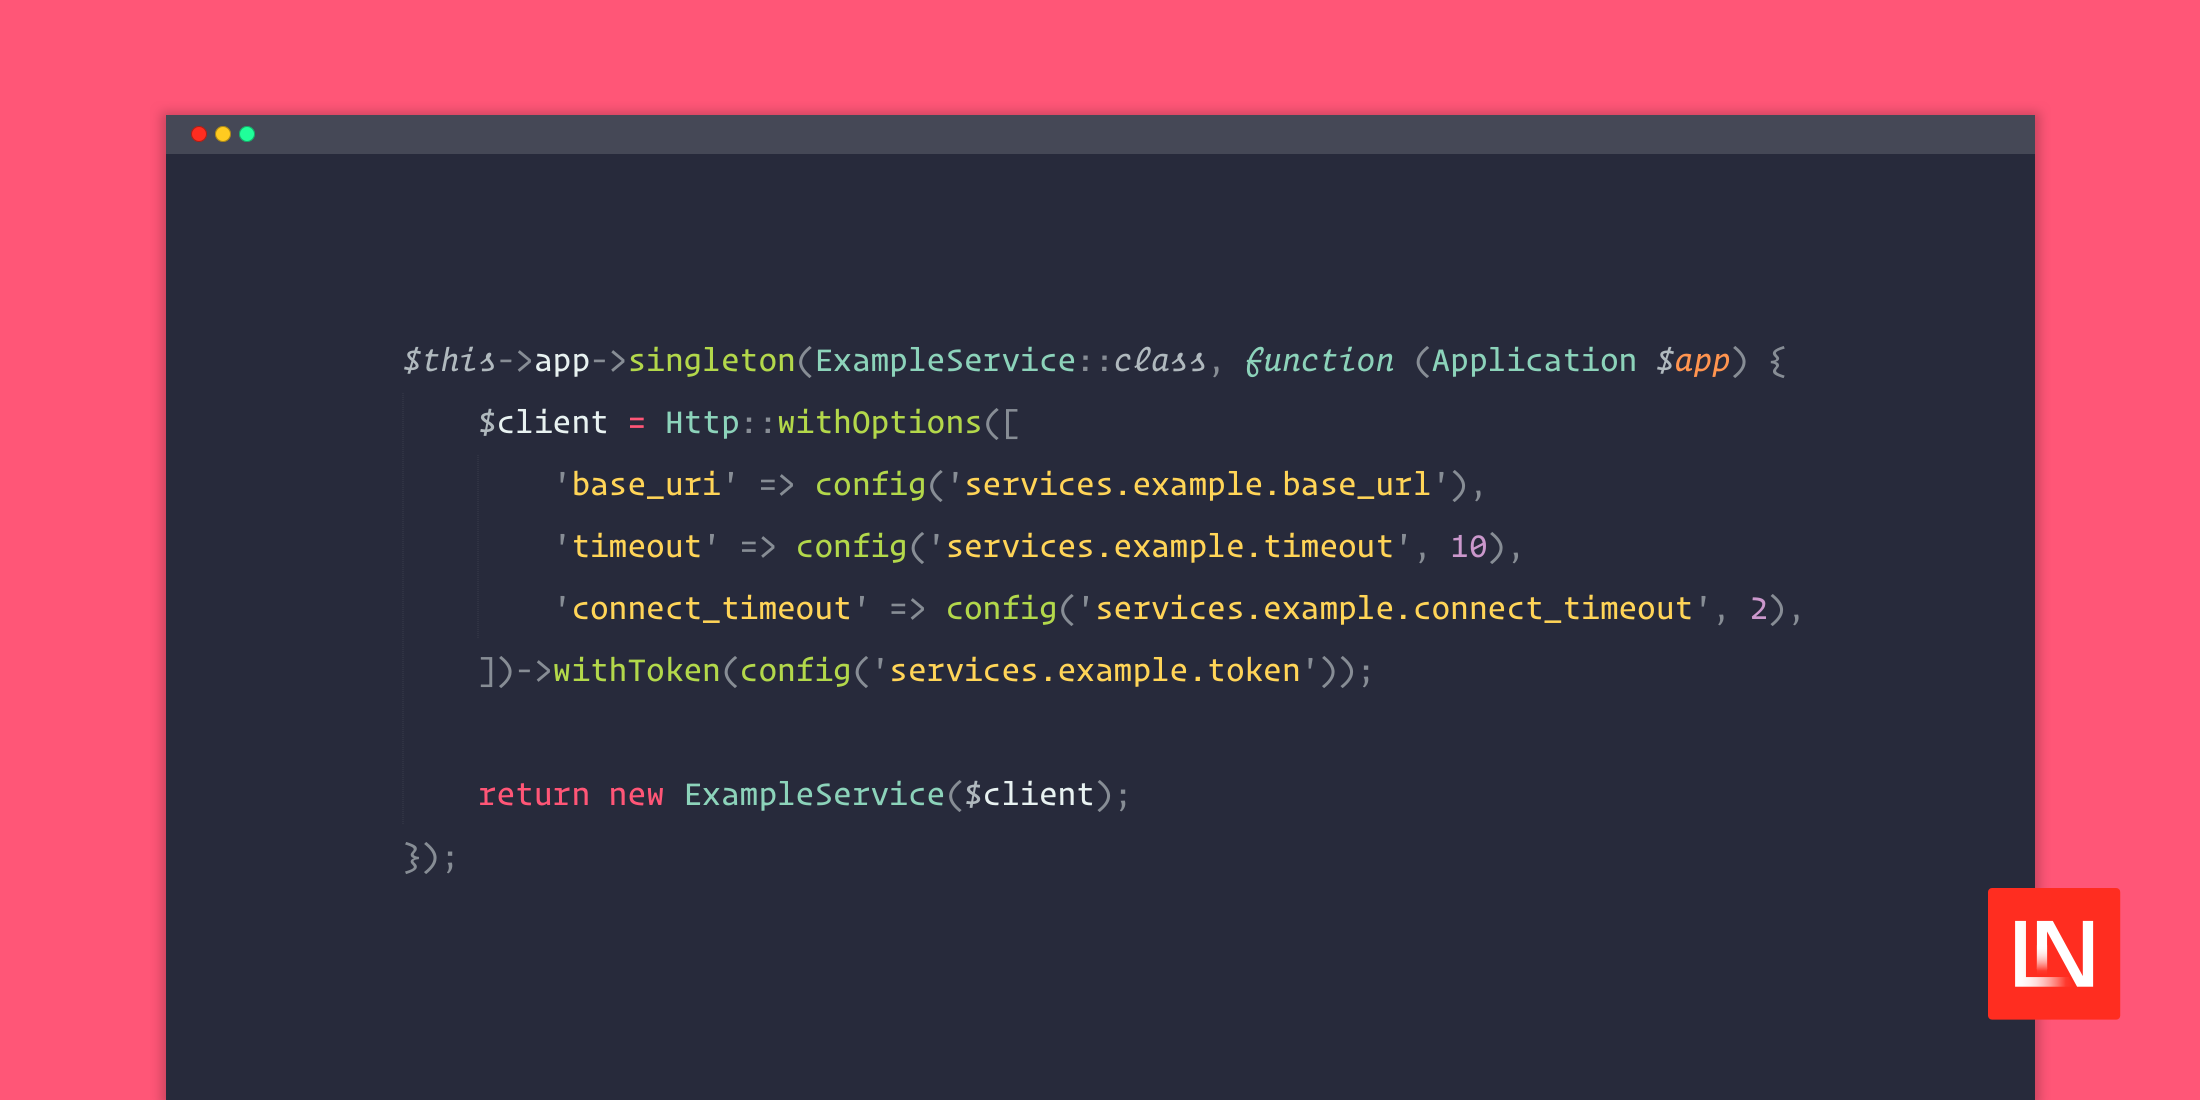
First, let's look at defining client settings in a service provider's register() method:
public function register(): void{ $this->app->singleton(ExampleService::class, function (Application $app) { $client = Http::withOptions([ 'base_uri' => config('services.example.base_url'), 'timeout' => config('services.example.timeout', 10), 'connect_timeout' => config('services.example.connect_timeout', 2), ])->withToken(config('services.example.token')); return new ExampleService($client); });}In the singleton service definition, we've chained a few calls to configure the client. The result is a PendingRequest instance that we can pass to our service constructor like the following:
class ExampleService{ public function __construct( private PendingRequest $client ) {} public function getWidget(string $uid) { $response = $this->client ->withUrlParameters(['uid' => $uid]) ->get('widget/{uid}'); return new Widget($response->json()); }}The service uses the withOptions() method to configure Guzzle options directly, but we could have also used some convenience methods provided by the HTTP client:
$this->app->singleton(ExampleService::class, function (Application $app) { $client = Http::baseUrl(config('services.example.base_url')) ->timeout(config('services.example.timeout', 10)) ->connectTimeout(config('services.example.connect_timeout', 2)) ->withToken(config('services.example.token')); return new ExampleService($client);});Or, if you want to combine macros with services, you could use the macros you define in your AppServiceProvider's boot() method:
$this->app->singleton(ExampleService::class, function (Application $app) { return new ExampleService(Http::github());});Portable Base URL Configuration
You might have seen the default base URL included a trailing / because it provides the most portability in my option, according to RFC 3986.
Take the following example service config (note the default base_url):
return [ 'example' => [ 'base_url' => env('EXAMPLE_BASE_URI', 'https://api.example.com/v1/'), 'token' => env('EXAMPLE_SERVICE_TOKEN'), 'timeout' => env('EXAMPLE_SERVICE_TIMEOUT', 10), 'connect_timeout' => env('EXAMPLE_SERVICE_TIMEOUT', 2), ],];If our API has a path prefix /v1/ in production and in staging, perhaps it is just https://stg-api.example.com/; using the trailing slash makes the URLs work as expected without code changes. In tandem with configuring the trailing /, note that all of the API calls in my code use relative paths:
$this->client ->withUrlParameters(['uid' => $uid]) // Example: // Staging - https://stg-api.example.com/widget/123 // Production - https://api.example.com/v1/widget/123 ->get('widget/{uid}');See Guzzle's creating a client documentation to see how different base_uri styles affect how URIs are resolved.
Preventing Stray Requests in Tests
Laravel's HTTP client provides excellent testing tools to make writing tests a breeze. When I write code that interacts with APIs, I feel uneasy that my tests somehow have actual network requests happening. Enter preventing stray requests with Laravel's HTTP client:
Http::preventStrayRequests(); Http::fake([ 'github.com/*' => Http::response('ok'),]); // Run test code// If any other code triggers an HTTP call via Laravel's client// an exception is thrown.In my opinion, the best way to use preventStrayRequests() is to define a setUp() method in test classes you expect to interact with APIs. Perhaps you might also add it to your application's base TestCase class:
namespace Tests; use Illuminate\Foundation\Testing\TestCase as BaseTestCase;use Illuminate\Support\Facades\Http; abstract class TestCase extends BaseTestCase{ use CreatesApplication; public function setUp(): void { parent::setUp(); Http::preventStrayRequests(); }}Doing so will ensure that every HTTP client call triggered in your test suite has a fake request backing it up. Using this method gives me a huge confidence boost that I've covered all my outbound requests in my tests with an equivalent fake.
Logging Handlers for HTTP Events
Laravel's HTTP client has valuable events you can use to quickly tap into essential stages of the request/response lifecycle. At the time of writing, three events are fired:
Illuminate\Http\Client\Events\RequestSendingIlluminate\Http\Client\Events\ResponseReceivedIlluminate\Http\Client\Events\ConnectionFailed
Let's say that you want to visualize every URL that your application makes requests to. We could easily tap into the RequestSending event and log out each request:
namespace App\Listeners; use Illuminate\Contracts\Queue\ShouldQueue;use Illuminate\Queue\InteractsWithQueue;use Illuminate\Support\Facades\Log; class LogRequestSending{ public function handle(object $event): void { Log::debug('HTTP request is being sent.', [ 'url' => $event->request->url(), ]); }}To make the event handler work, add the following to the EventServiceProvider class:
use App\Listeners\LogRequestSending;use Illuminate\Http\Client\Events\RequestSending;// ...protected $listen = [ Registered::class => [ SendEmailVerificationNotification::class, ], RequestSending::class => [ LogRequestSending::class, ],];Once it's all hooked up, you'd see something like the following in your log for each request attempted with the HTTP client:
[2023-03-17 04:06:03] local.DEBUG: HTTP request is being sent. {"url":"https://api.example.com/v1/widget/123"}Learn More
The official Laravel HTTP documentation has everything you need to get started. I hope this tutorial has given you some inspiration and tricks you can use in your Laravel apps

