Laravel Jobs and Queue 101: queue connections, using multiple queues, and setting up priorities
Published on by Youghourta Benali

Now that you’ve learned the basics of jobs and queues in Laravel with part 1 of this series, let’s learn about how we can use different queue connections (other than the database one), how we can use multiple different queues for different jobs, and how we can prioritize some jobs/queues over others.
Using RabbitMQ
Even though the “default” choice in the laravel community when it comes to choosing another queue connection other than the database one is Redis, we are going to use RabbitMQ instead.
I decided to cover RabbitMQ for the following reasons:
- other queue connections are fairly well documented comparing to RabbitMQ (take a look at horizon https://laravel.com/docs/6.x/horizon, the official Laravel package for Redis queues)
- from my own experience, I found that RabbitMQ is fare superior to other queue connections
- If you are reading this article, chances are that you are new to the world of jobs and queue, and it would be better to focus on learning how to handle them without focusing too much on how to install Redis, and how to make it work properly on both your local machine and on your production environment. With RabbitMQ we can utilize a third-party service that hosts and manages the RabbitMQ instance for us. My go-to service is cloudAMQP.com. Its free trier is more than enough for this tutorial, and for many side-projects, you’d be working on (1 million job a month, 100 queues,…)
Set up the queue
Head to cloudamqp.com, signup, and create a Little Lemur instance

After you create the instance, you’d get its details like this:
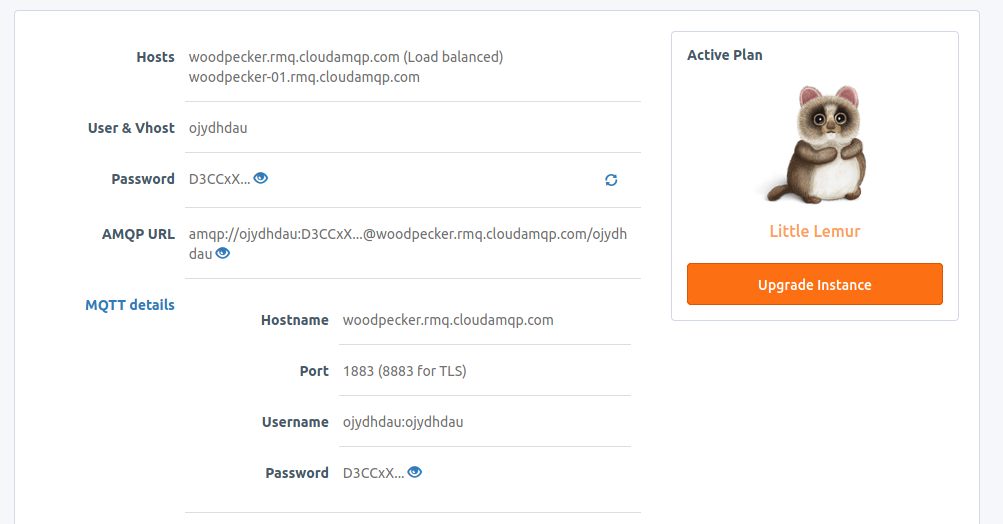
now we need to let Laravel know that we want to push the jobs to RabbitMQ instead.
First, we need to add the following package: vladimir-yuldashev/laravel-queue-rabbitmq
composer require vladimir-yuldashev/laravel-queue-rabbitmqafter that, we need to add the following connection to the config/queue.php file
'rabbitmq' => [ 'driver' => 'rabbitmq', 'queue' => env('RABBITMQ_QUEUE', 'default'), 'connection' => PhpAmqpLib\Connection\AMQPLazyConnection::class, 'hosts' => [ [ 'host' => env('RABBITMQ_HOST', '127.0.0.1'), 'port' => env('RABBITMQ_PORT', 5672), 'user' => env('RABBITMQ_USER', 'guest'), 'password' => env('RABBITMQ_PASSWORD', 'guest'), 'vhost' => env('RABBITMQ_VHOST', '/'), ], ], 'options' => [ 'ssl_options' => [ 'cafile' => env('RABBITMQ_SSL_CAFILE', null), 'local_cert' => env('RABBITMQ_SSL_LOCALCERT', null), 'local_key' => env('RABBITMQ_SSL_LOCALKEY', null), 'verify_peer' => env('RABBITMQ_SSL_VERIFY_PEER', true), 'passphrase' => env('RABBITMQ_SSL_PASSPHRASE', null), ], ], /* * Set to "horizon" if you wish to use Laravel Horizon. */ 'worker' => env('RABBITMQ_WORKER', 'default'), ],and then we need to update the .env file as follows:
QUEUE_CONNECTION=rabbitmqRABBITMQ_DSN=amqp://RABBITMQ_HOST=woodpecker.rmq.cloudamqp.comRABBITMQ_VHOST=ojydhdauRABBITMQ_USER=ojydhdauRABBITMQ_PASSWORD=Bctt-m_WhXrWdNGcb1L5D7D5j-3j-8GcRABBITMQ_QUEUE=jobsPS: the QUEUE_CONNECTION variable is already in the .env file, so make sure to update the existing one
Before we test the new configuration let’s do the following:
Let’s open the RabbitMQ manager and check whether we have any queues and jobs there:
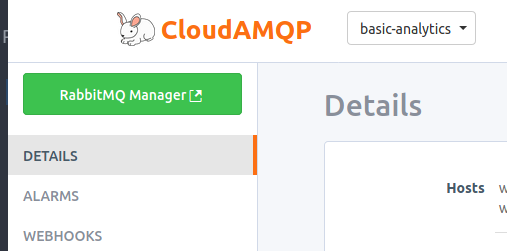
as you can see, we don’t have any queues or jobs

now before we send any new hits, we need to restart our local web server in order to take the new .env file changes into consideration.
And now if you send a new POST request to the application, we will notice the following:
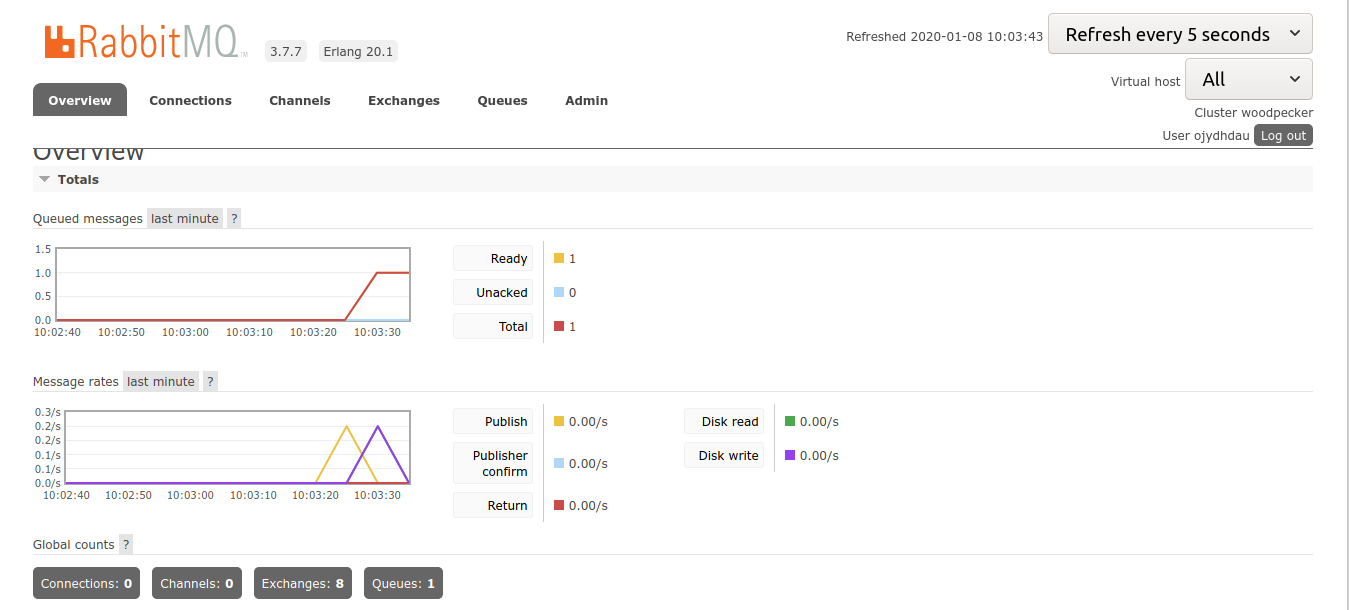
and when we switch to the queues tab, we will notice that a new queue was created:
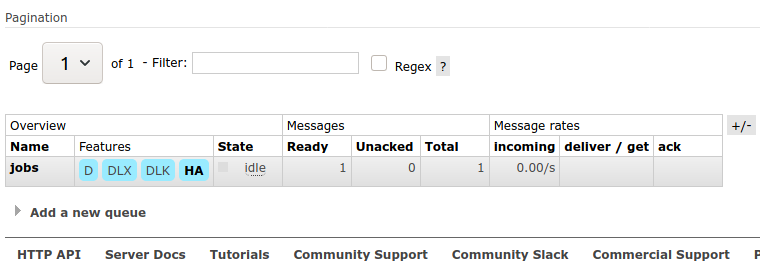
notice that the state of the queue is idle and as soon as we execute the queue:work command, the state will change to running and the job will be consumed
PS: when using RabbitMQ, you don’t need to check manually whether the queue workers are up, all you need to do is check the status of the queues (if they are “idle” it means they are not working).
Using multiple queues
Imagine now that you have deployed your application and opened it up to the public. Another task that could benefit from queues is sending welcome emails to newly registered users.
One reason why you’d want to delegate that to a queue is that most likely you are going to use a third-party service to send the emails, and you don’t want to keep your users waiting until the emails are sent before you redirect them to the app dashboard.
The process will be similar to handling incoming POST requests, and each time we want to send a new email, it will be queued and then processed in the background.
One thing you’ll notice at this stage is that all jobs are queues in the same queue named jobs (remember that we have this variable RABBITMQ_QUEUE=jobs in our .env file).
If we don’t specify the name of the queue where we want to dispatch the job, Laravel will just send them to the default queue. But we can also send each type of jobs to a specific job.
// This job is sent to the default queue...Job::dispatch(); // This job is sent to the "emails" queue...Job::dispatch()->onQueue('emails');Now whenever a user signs up, a new WelcomeEmail job will be dispatched to the emails queue.
In order to consume the jobs, we have two choices:
either we open up a new tab and run the queue:work command and listen specifically to this queue:
php artisan queue:work –queue=emailsor we can consume both queues in the same tab, but here we are going to give a priority for each queue. For instance, if we want to start consuming all the jobs in the jobs queue before processing any emails we can execute the following:
php artisan queue:work --queue=jobs,emailsPS: most likely you won’t need to set up priorities when you deploy your application to your production server since we will be processing each queue on its own background process.
What’s next?
If you followed all along, you are now ready to deploy your application to your production server.
In the next article, we will take a look at how we can run the workers on a remote server since we can’t just keep terminal tabs open to consume the jobs.
Back-end developer http://youghourta.com I built:
- botmarker.com
- bookmarkingBot.com
- todocol.com
I'm also the author of "Laravel Testing 101" http://laraveltesting101.com


