If you're building a Laravel application, package, or CLI (command-line interface) application, you'll likely create your own custom Artisan commands at some stage. When creating these commands, you might want to make the output unique and stand out from the rest of the console output. To do this, you can the awesome Termwind package.
In this article, we're going to take a look at what Termwind is, how to install it, and how to use it in your own Artisan commands. We'll then update an old example Artisan command step-by-step to use Termwind and see how it improves the output.
What is Termwind?
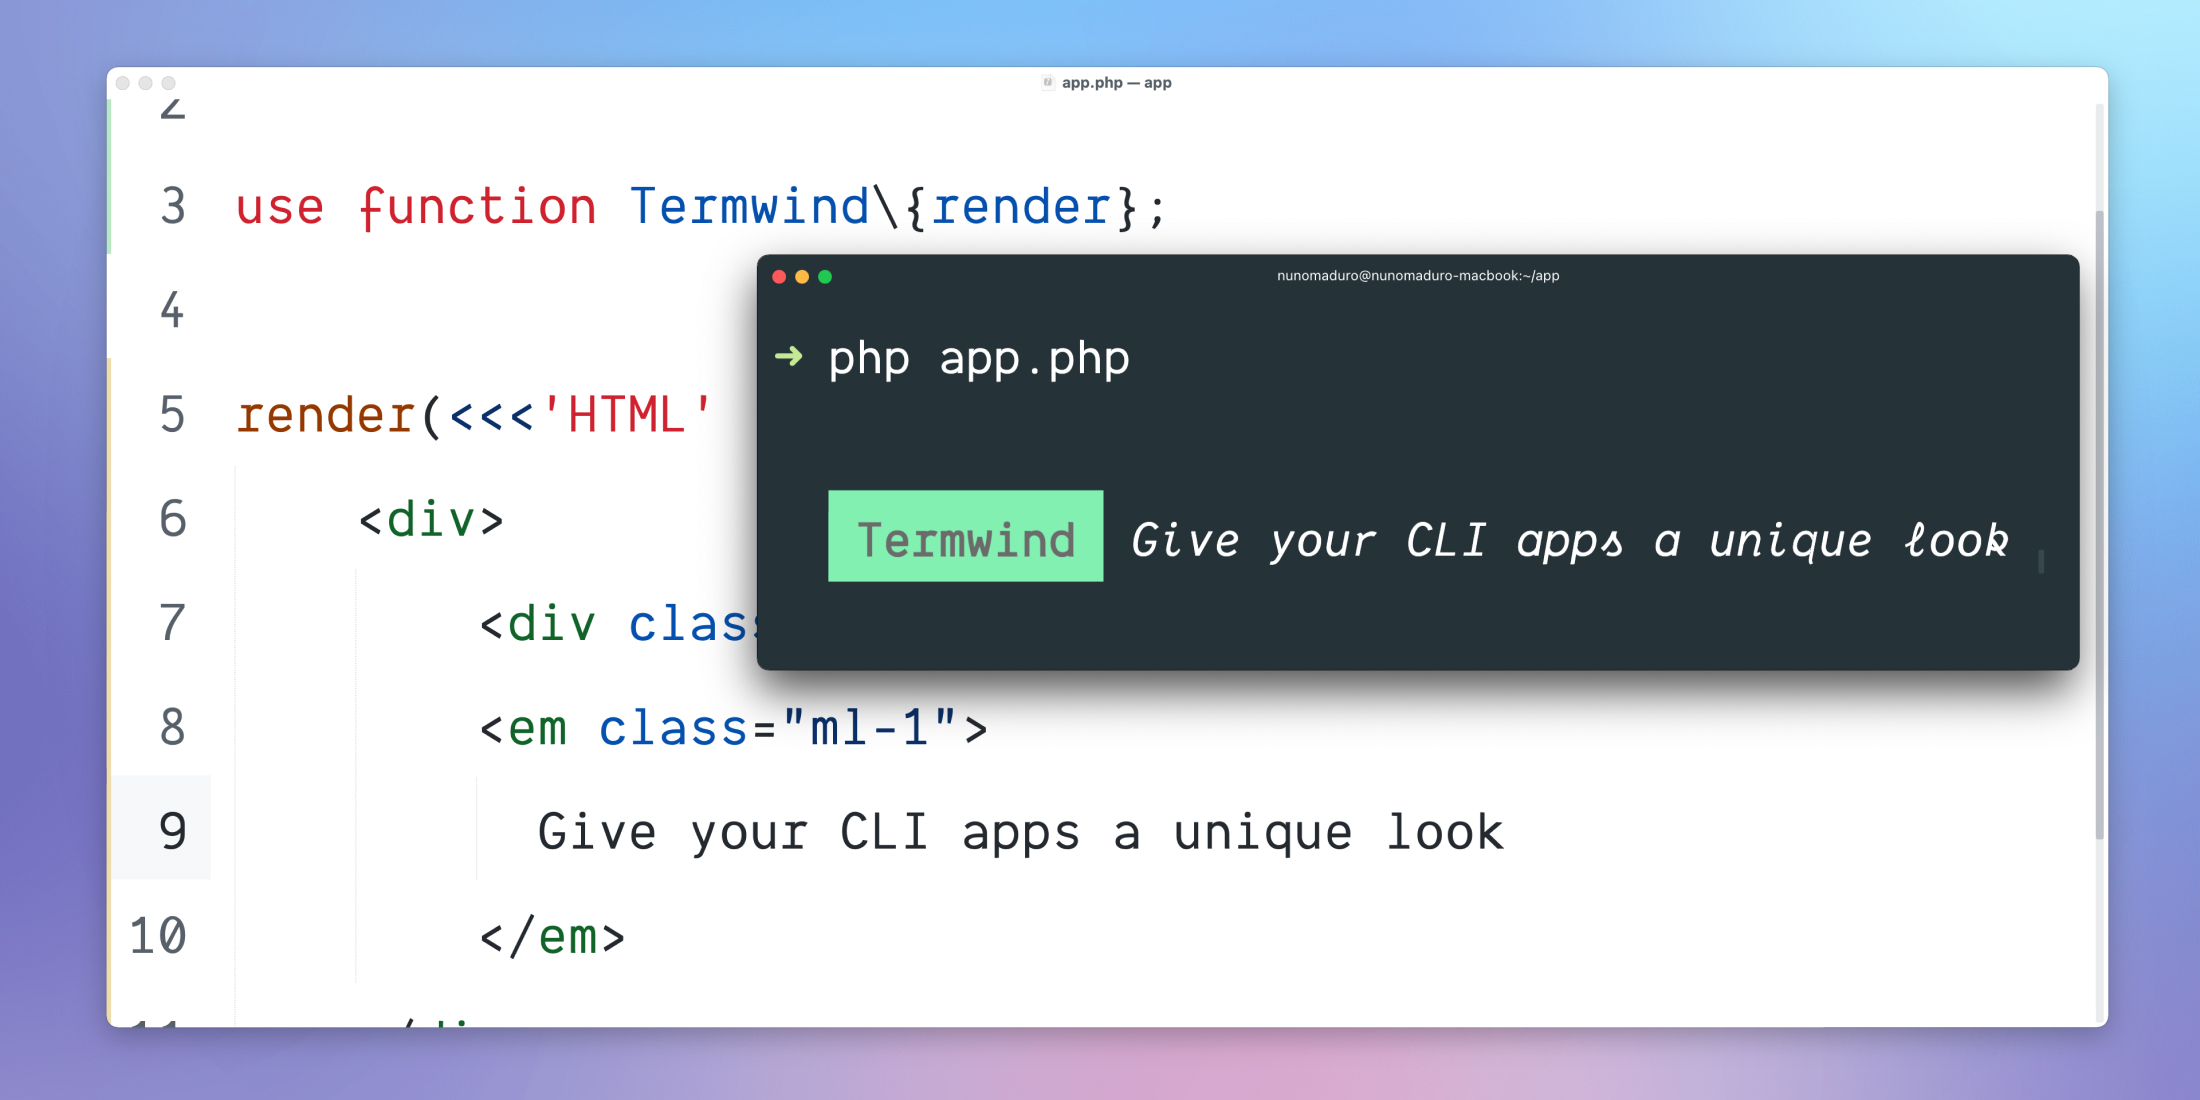
Termwind is a PHP package created and maintained by Nuno Maduro (and other awesome contributors such as Francisco Madeira) that allows you to use Tailwind-like CSS classes in your PHP code to add styling to your CLI output.
It's a great tool to use if you want to make your commands' output look unique and stand out from the crowd. So it's very handy to use if you're building a CLI application or a Laravel package that provides any Artisan commands.
It provides the ability for you to build your output using HTML and Tailwind-like classes such as text-blue-500, flex and space-x-1. You can check out a full list of the classes available in the package's documentation.
Usage
Installation
To get started with using Termwind in your Laravel apps, you'll need to install it using Composer by running the following command:
composer require nunomaduro/termwindThat's it! Termwind is now installed and ready to go.
Displaying Output Using Inline HTML
Now that we have Termwind installed, let's take a look at how we can use it to render some output to the CLI.
The quickest way to render the output is to pass some HTML as a string directly to the package's render function.
To give this a bit of context, let's take a look at a simple example. We'll imagine that we have an Artisan command that we can use to output some statistics about our Laravel application. For the sake of this article, we'll be using hardcoded statistics just so we can focus purely on Termwind.
So let's take a look at the command:
namespace App\Console\Commands; use Illuminate\Console\Command;use function Termwind\{render}; class AppStats extends Command{ protected $signature = 'app:stats'; protected $description = 'Display the application stats'; public function handle(): int { render(<<<'HTML' <div class="mx-2 my-1"> <div class="space-x-1"> <span class="px-1 bg-blue-500 text-white">Application Info</span> </div> <div class="mt-1"> <span class="font-bold text-green">Totals</span> <div class="flex space-x-1"> <span class="font-bold">Users</span> <span class="flex-1 content-repeat-[.] text-gray"></span> <span class="font-bold text-green">150</span> </div> <div class="flex space-x-1"> <span class="font-bold">Posts</span> <span class="flex-1 content-repeat-[.] text-gray"></span> <span class="font-bold text-green">200</span> </div> <div class="flex space-x-1"> <span class="font-bold">Comments</span> <span class="flex-1 content-repeat-[.] text-gray"></span> <span class="font-bold text-green">175</span> </div> </div> <div class="mt-1"> <span class="font-bold text-green">Health Checks</span> <div class="flex space-x-1"> <span class="font-bold">Mailcoach</span> <i class="text-gray">Newsletter</i> <span class="flex-1 content-repeat-[.] text-gray"></span> <span class="font-bold text-green">CONNECTED</span> </div> <div class="flex space-x-1"> <span class="font-bold">Vonage</span> <i class="text-gray">SMS</i> <span class="flex-1 content-repeat-[.] text-gray"></span> <span class="font-bold text-red">ERROR!</span> </div> </div> </div> HTML); return self::SUCCESS; }}The above command will output the following to the CLI:
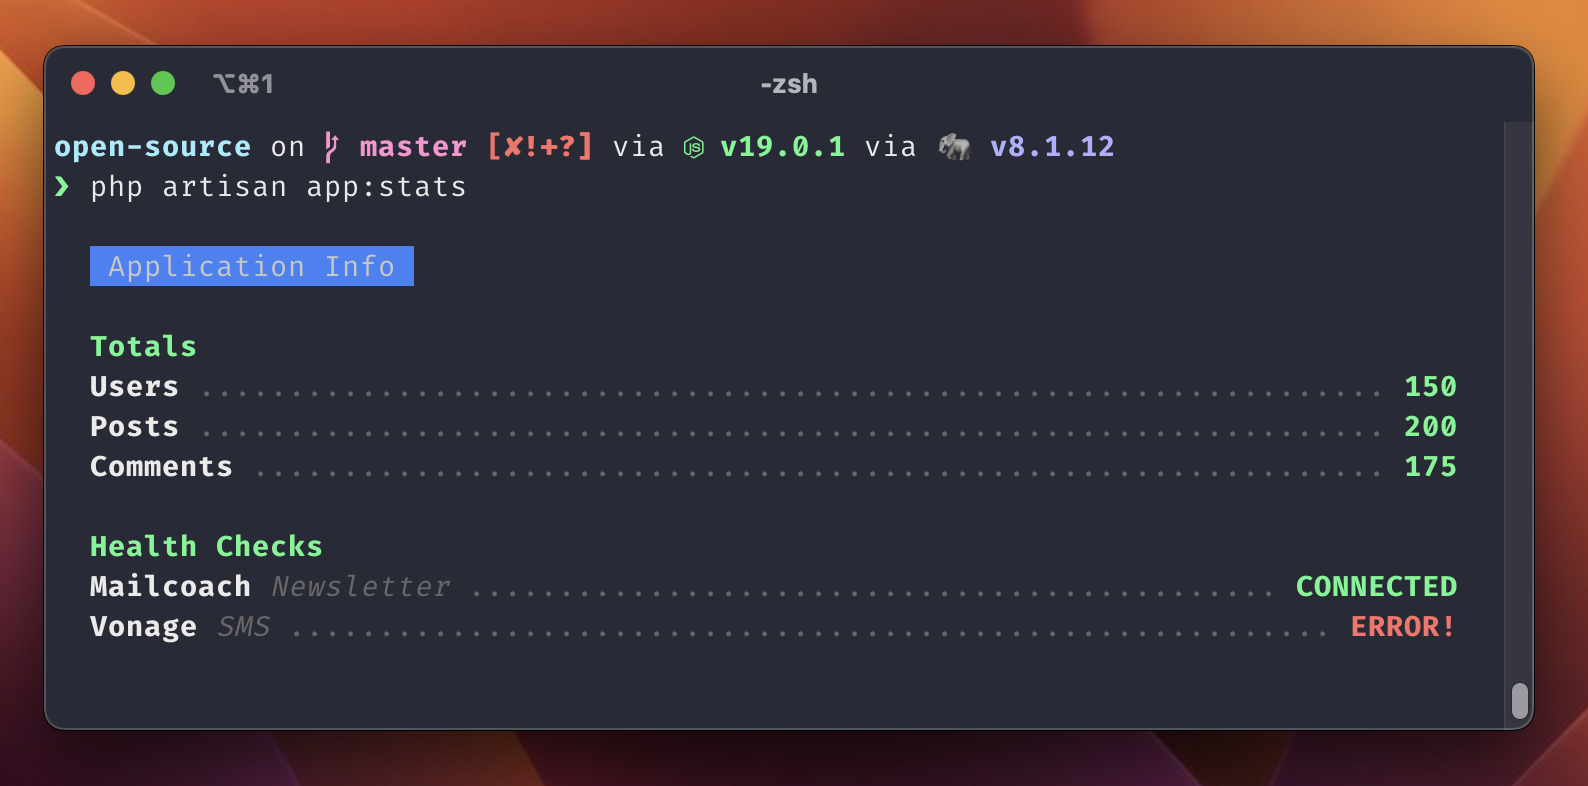
As you can see, we can generate some really cool output using Termwind. But having the HTML directly in the command class can become messy very quickly. It's not very readable or maintainable. For example, if we wanted to use the same styles in other commands, we'd potentially be duplicating a lot of the shared HTML.
It is worth noting, though, that for smaller amounts of output, this approach can be perfectly fine. It's just when you start to have a lot of output that it can become a bit tedious to maintain.
Termwind's style function can help us to group styles together so that we can reuse them in multiple places. However, this doesn't necessarily solve the issue of the actual HTML that builds the structure of the output. I would recommend checking out the style function in the documentation to learn more about how you can use it to make your maintenance simpler.
Displaying Output Using a View
Now that we've seen how to output some HTML directly to the CLI, let's take a look at how we can use a Blade view to render the output. I prefer using this approach as it keeps the HTML separate from the command class and makes it easier to maintain and reuse across different commands.
To start, let's create a new cli directory in our projects resources/views directory. We'll store all our CLI-specific views here.
We'll then create a new app-stats.blade.php view in the cli directory. This will be the view that we'll use to render the output for our app:stats command, and it will contain the HTML from our previous example (everything between <<<'HTML' and HTML).
Now that we have the HTML in the Blade view, we can update our command class to use it. We'll do this by using the view helper function to render the view and pass the output of it to Termwind's render function:
namespace App\Console\Commands; use Illuminate\Console\Command;use function Termwind\{render}; class AppStats extends Command{ protected $signature = 'app:stats'; protected $description = 'Display the application stats'; public function handle(): int { render(view('cli.app-stats')); return self::SUCCESS; }As you can see, this has made the command class much easier to understand and maintain. We can now focus on the logic of the command and not have to worry about the HTML cluttering this class.
A huge benefit of using this approach is that it also allows us to use Blade components to make our output even more reusable. We can create a component for each of the different sections of the output and then use them in our view.
Let's take a look at how we can use some Blade components to improve our command's maintainability.
We'll start by creating a new components/cli directory in our resources/views directory. Similar to our resources/views/cli directory, this is where we'll keep all our CLI-specific Blade components.
We can identify two main parts of our command's output that could be split into components in our example above:
- The totals
- The health checks
So we'll create a component for each of these. Please remember though, you can create as few or as many components as you'd like to fit your project's needs.
Let's start by creating a new totals.blade.php component in the resources/views/components/cli directory. This component will be used to render the totals for each statistic that we have.
@props([ 'title', 'value',]) <div class="flex space-x-1"> <span class="font-bold">{{ $title }}</span> <span class="flex-1 content-repeat-[.] text-gray"></span> <span class="font-bold text-green">{{ $value }}</span></div>As you can see, this component is very simple and has 2 different properties defined using the @props Blade directive. It accepts two properties, title and value. This is a great way to ensure that we don't forget to pass any required properties to the component.
We can now also create a new connection.blade.php component in the resources/views/components/cli directory:
@props([ 'title', 'subText', 'connected' => false,]) <div class="flex space-x-1"> <span class="font-bold">{{ $title }}</span> <i class="text-gray">{{ $subText }}</i> <span class="flex-1 content-repeat-[.] text-gray"></span> @if($connected) <span class="font-bold text-green">CONNECTED</span> @else <span class="font-bold text-red">ERROR!</span> @endif</div>You may have noticed that the component has 3 different properties defined using the @props Blade directive. This enforces that we must pass a title property, subText property, and an optional connected property whenever we use the component.
As we can see from our example earlier, if the connected property is set to true, the component will output the CONNECTED text in green. Otherwise, it will output the ERROR! text in red.
Now that we have the components created and ready, we can convert our resources/views/cli/app-stats.blade.php view to use them:
<div class="mx-2 my-1"> <div class="space-x-1"> <span class="px-1 bg-blue-500 text-white">Application Info</span> </div> <div class="mt-1"> <span class="font-bold text-green">Totals</span> <x-cli.stat title="Users" value="150" /> <x-cli.stat title="Posts" value="200" /> <x-cli.stat title="Comments" value="175" /> </div> <div class="mt-1"> <span class="font-bold text-green">Health Checks</span> <x-cli.connection title="Mailcoach" subText="Newsletter" :connected="true" /> <x-cli.connection title="Vonage" subText="SMS" :connected="false" /> </div></div>As you can see, the HTML is now much easier to read and understand. We've managed to reduce the amount of duplicated HTML by calling the components using <x-cli.stat ... /> and <x-cli.connection ... /> Blade syntax. One thing that I like about this approach is that because we can use Blade, it makes building CLI outputs feel very similar to building web views.
Converting an Existing Command
Now that we've seen how we can output HTML to the CLI using Termwind, let's briefly look at how we can convert an existing command to use Termwind.
Let's imagine that we have an Artisan command that does the following:
- Asks the user for a search term.
- Searches the database for any users that have an email address that contains the search term.
- Outputs the results to the CLI.
This is only a simple example but should give us a good chance to highlight several of the features that Termwind provides. For the sake of the example, we also won't be covering how we search the database for the users, as this is not the focus of this article. But we can assume that the searchUsers method in the example below will return a Collection of User models.
Our existing command might look something like so:
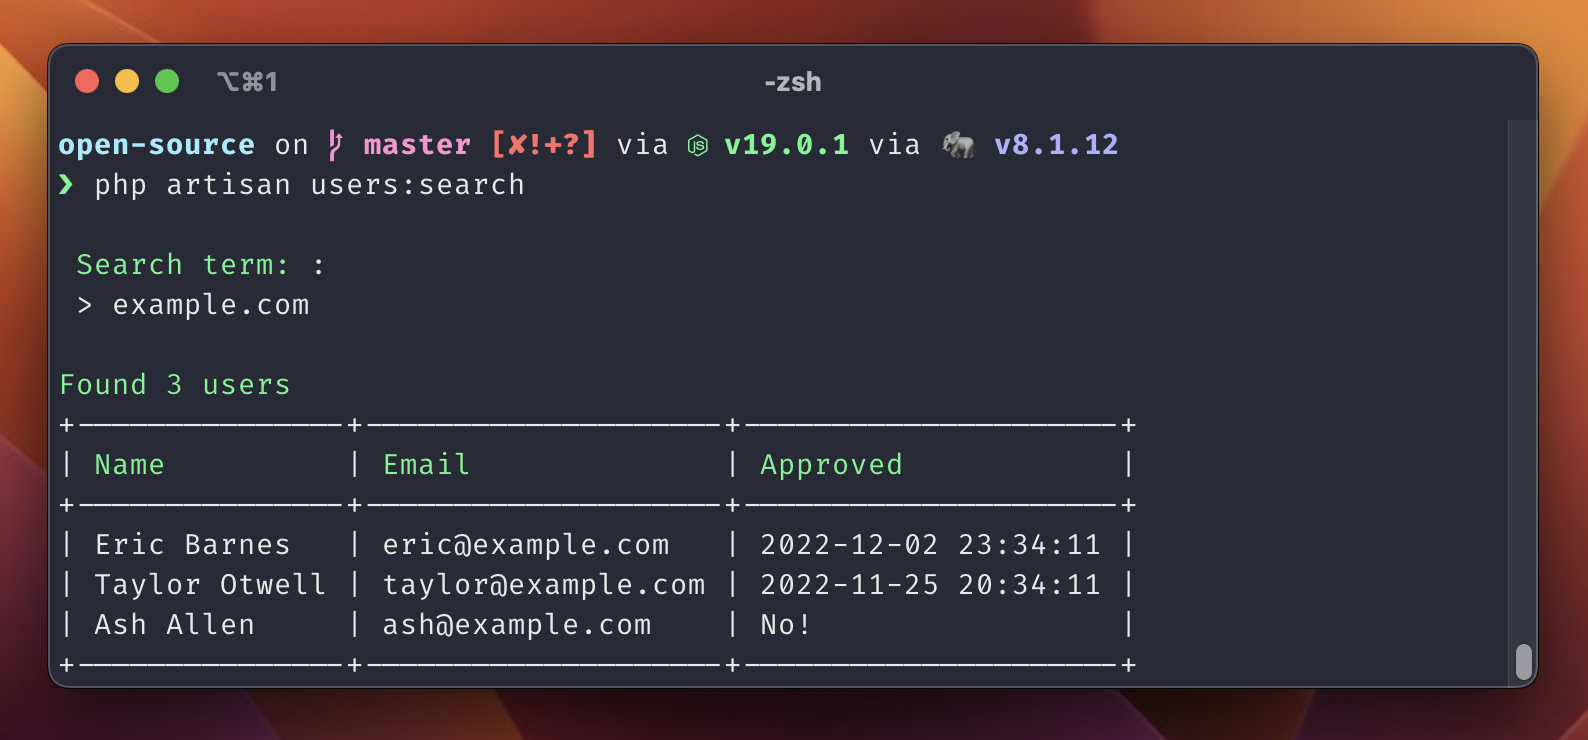
namespace App\Console\Commands; use App\Models\User;use Illuminate\Console\Command; final class UsersSearch extends Command{ protected $signature = 'users:search'; protected $description = 'Search for users in the system'; public function handle(): int { $searchTerm = $this->ask('Search term: '); $users = $this->searchUsers($searchTerm); $rows = $users->map(fn (User $user): array => [ $user->name, $user->email, $user->email_verified_at ?? 'No!', ])->all(); $this->info('Found '.count($users).' users'); $this->table(['Name', 'Email', 'Approved'], $rows); return self::SUCCESS; }}The command above would provide the following output:
If we wanted to update the command to use Termwind, our class may look like so:
namespace App\Console\Commands; use App\Models\User;use Illuminate\Console\Command;use function Termwind\{ask, render}; final class UsersSearch extends Command{ protected $signature = 'users:search'; protected $description = 'Search for users in the system'; public function handle(): int { $searchTerm = ask(<<<HTML <span class="mt-1 ml-2 mr-1 bg-green px-1 text-black"> Search term: </span> HTML); $users = $this->searchUsers($searchTerm); render(view('cli.user-search', [ 'users' => $users, ])); return self::SUCCESS; }}Let's take a look at what's changed.
As you may have noticed, we have replaced the $this->ask call with Termwind's ask function. This will provide us with a similar experience to the existing command, but with the added benefit of being able to use Termwind's styling.
We have also replaced the $this->info and $this->table calls by moving the rest of the command's output to a resources/views/cli/user-search.blade.php Blade view (like we covered earlier in this article). As we can see, we've passed the $users collection to the view in the exact same way that we could pass data to a web view. The Blade view looks like so:
<div class="m-1"> <div class="text-right mb-1 w-full"> <span class="text-indigo-500">Found [<b>{{ $users->count() }}</b>] users</span> </div> @foreach($users as $user) <div> <div class="flex space-x-1"> <span class="font-bold">{{ $user->name }}</span> <span class="text-gray">[{{ $user->email }}]</span> <span class="flex-1 content-repeat-[.] text-gray"></span> <span class="text-gray">Approved:</span> @if($user->email_verified_at) <span class="font-bold text-green">{{ $user->email_verified_at }}</span> @else <span class="font-bold text-red">NO!</span> @endif </div> </div> @endforeach</div>In the Blade file, we are displaying the total number of users found, then looping through the users Collection passed to the view and outputting the users' names, emails, and whether they have been approved.
As a result of making these changes, the command now outputs the following:
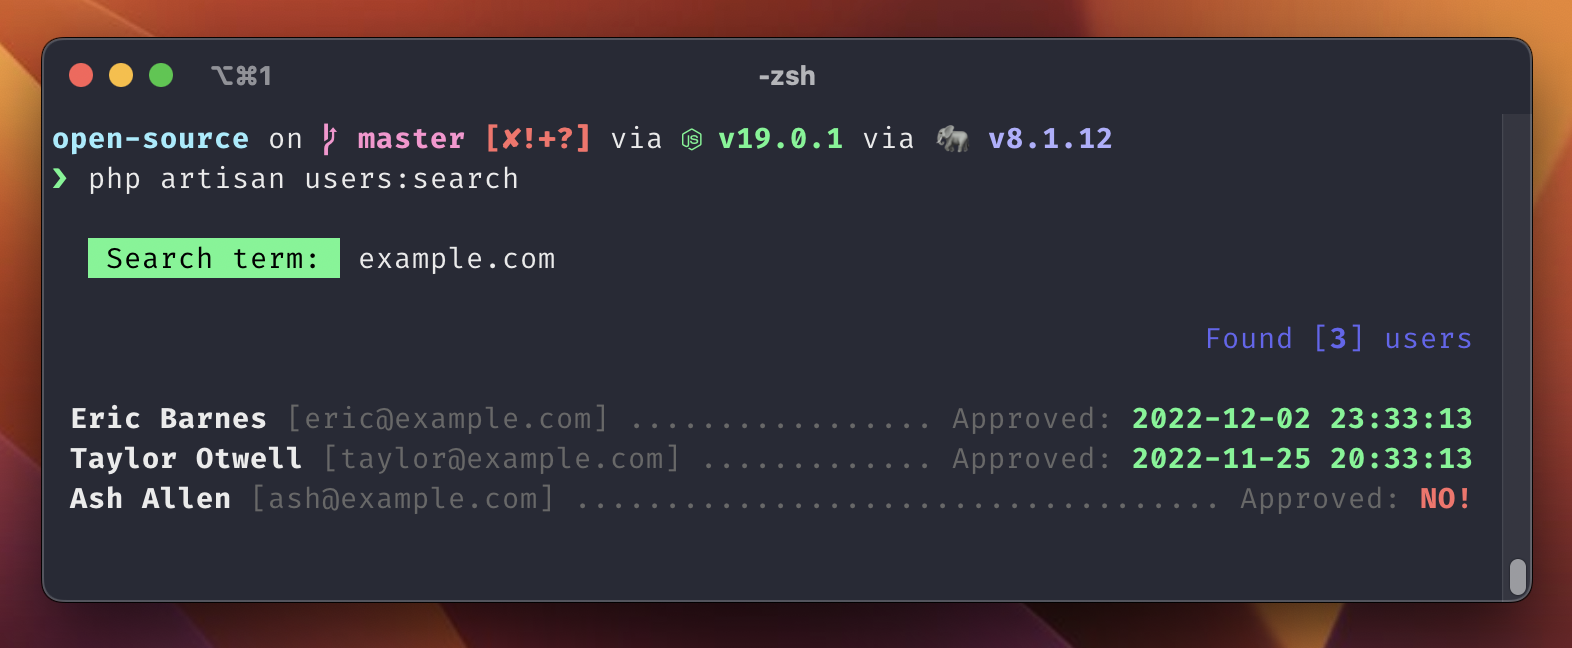
We have now successfully converted the Artisan command to use Termwind!
Conclusion
Hopefully, this article should have given you an overview of what Termwind is and how you can use it to build awesome CLI outputs for your Artisan commands. You should now be able to take your existing commands and convert them to use Termwind, or even start building new commands from scratch.
If you want to read more into Termwind, you can check out the documentation on GitHub.

I am a freelance Laravel web developer who loves contributing to open-source projects, building exciting systems, and helping others learn about web development.