
Laravel, a PHP framework for web development, impresses me as being the most complete of its kind on GitHub. Also, outstanding related resources abound: community software, learning platforms, publications, and supporting packages, such as Forge, Envoyer, Vapor, and many others built by Larvel’s founder, Taylor Otwell.
This article shows you how to easily upload, transform, and manage media on the Cloudinary platform with Cloudinary’s Laravel SDK.
Set Up a Laravel Project
Initiate a project in Laravel 8:
First, install Composer and PHP on your development or production machine and then run this command:
composer create-project --prefer-dist laravel/laravel easymediaNext, go to the easymedia directory and rename the env.example file to .env.
Then, Run the project with the command php artisan serve.
Your Laravel project is now up and running.
Set Up Cloudinary’s Laravel SDK
With Cloudinary, you can efficiently optimize media assets—regardless of programming language. One reason is that, by default, Cloudinary automatically optimizes all transformed images. Plus, its integrated and fast delivery capability through content delivery networks (CDNs) ensures that your images are seamlessly displayed on your viewers’ devices.
One of the supporting packages mentioned in the introduction is Cloudinary’s Laravel SDK. Follow the steps below to install it and enable file uploads and optimization.
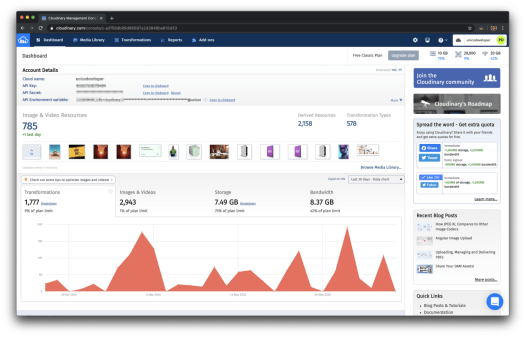
1. Sign up for a free Cloudinary account, log in, and note your cloud name and API keys from the dashboard.
2. Install Cloudinary’s Laravel SDK:
composer require cloudinary-labs/cloudinary-laravelImportant: Be sure to follow the steps described in the above link. Publish the configuration file and add your Cloudinary credentials to the .env file of your app.
Set Up File Uploads
1. Create a file-upload controller (FileUpload Controller) in your project:
php artisan make:controller FileUploadController2. Open the FileUploadController.php file and add a method for displaying the upload form:
<?php namespace App\Http\Controllers; use Illuminate\Http\Request; class FileUploadController extends Controller{ public function showUploadForm() { return view('upload'); }}3. Create an upload.blade.php file in the resources/views directory and populate the file with the code below:
<html> <head> <meta charset="utf-8"> <meta name="viewport" content="width=device-width, initial-scale=1"> <title>Laravel File Upload</title> <!-- Fonts --> <link href="https://fonts.googleapis.com/css?family=Nunito:200,600" rel="stylesheet"> <!-- Styles --> <style> html, body { background-color: #fff; color: #636b6f; font-family: 'Nunito', sans-serif; font-weight: 200; height: 100vh; margin: 0; } .full-height { height: 100vh; } .flex-center { align-items: center; display: flex; justify-content: center; } .position-ref { position: relative; } .top-right { position: absolute; right: 10px; top: 18px; } .content { text-align: center; } .title { font-size: 84px; } .links > a { color: #636b6f; padding: 0 25px; font-size: 13px; font-weight: 600; letter-spacing: .1rem; text-decoration: none; text-transform: uppercase; } .m-b-md { margin-bottom: 30px; } </style> </head> <body> <div class="flex-center position-ref full-height"> <div class="content"> <div class="title m-b-md"> Laravel File Upload </div> @if ($message = Session::get('success')) <div class="alert alert-success alert-block"> <button type="button" class="close" data-dismiss="alert">×</button> <strong>{{ $message }}</strong> </div> @endif <div class="links"> <form action="/upload" method="POST" enctype="multipart/form-data"> @csrf <div class="row"> <div class="col-md-6"> <input type="file" name="image" class="form-control"> </div> <div class="col-md-6"> <button type="submit" class="btn btn-success">Upload a File</button> </div> </div> </form> </div> </div> </div> </body></html>4. Go to the routes/web.php directory and add two routes: one to display the form and the other to process the file upload:
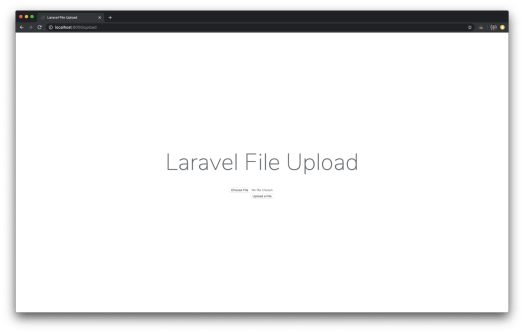
Route::get('upload', 'App\Http\Controllers\FileUploadController@showUploadForm');Route::post('upload', 'App\Http\Controllers\FileUploadController@storeUploads');Now reload the app and go to the /upload route. This page is then displayed:
Two Other Upload Options
This section describes two other upload options.
Multiple Uploads
By default, you can upload only one file at a time, after which a related HTML5 capability sends it to the /upload route for processing by FileUploadController. To change that default limit:
Open the upload.blade.php file and place the @cloudinaryJS directive right above the <head> layout’s closing tag:
<head> ... @cloudinaryJS</head>Add <x-cld-upload-button>, one of the BLADE UI components in Cloudinary’s Laravel SDK, to the upload.blade.php file, replacing the upload form with that component:
<div class=”links”> <x-cld-upload-button> Upload Files </x-cld-upload-button></div>Reload the /upload route. You’ll see the Upload Files button prominently displayed in the main screen. Click the button for the multipurpose upload modal.
Through this modal, you can perform the following upload-related tasks:
- Drag and drop multiple files at once as a bulk upload.
- Paste the URL to a remote file as a conduit for uploads.
- Upload the images taken with a camera directly from the camera.
- Upload files from Dropbox, Facebook, Google Drive, Instagram, or Shutterstock.
Important: Be sure to configure your CLOUDINARY_UPLOAD_PRESET environment variable with an upload preset from your Cloudinary dashboard.
Have a try: drag and drop several files for an instantaneous upload. It’s amazing.
Optional. Display the uploaded files by leveraging <x-cld-image></x-cld-image>, a BLADE UI component in Cloudinary’s Laravel SDK by editing your upload.blade.php file and replacing the values of the public-id instances with the image names on Cloudinary. Afterwards, add the
<div> <x-cld-image public-id="yjseyutbejhdyoqioshd" width="300"></x-cld-image> <x-cld-image public-id="tnxmsswkzt1sbqimuuld" width="300"></x-cld-image> <x-cld-image public-id="djhozs9z8x5g1cvefd0f" width="300"></x-cld-image> <x-cld-image public-id="iojhvkijnv91ftorowuu" width="300"></x-cld-image></div>Uploads With Laravel’s File-Upload Controller
A traditional way to upload files is through Laravel’s file-upload controller. Add the storeUploads method to the FileUploadController class, as follows:
public function storeUploads(Request $request){ $response = cloudinary()->upload($request->file('file')->getRealPath())->getSecurePath(); dd($response); return back() ->with('success', 'File uploaded successfully');}*Note: Replace the <x-cld-upload-button> UI component with the form described in step 3 in the section Set Up File Uploads.
Now test with an upload. If it succeeds, Cloudinary displays a confirmation…
Other Options on Cloudinary
By configuring the cloudinary() helper method, you can specify the way in which you’d like Cloudinary’s Laravel SDK to store and upload image and video files. Here are the choices:
// Upload an image file to Cloudinary with one line of code.$uploadedFileUrl = cloudinary()->upload($request->file('file')->getRealPath())->getSecurePath(); // Upload a video file to Cloudinary with one line of code.$uploadedFileUrl = cloudinary()->uploadVideo($request->file('file')->getRealPath())->getSecurePath(); // Upload any file to Cloudinary with one line of code.$uploadedFileUrl = cloudinary()->uploadFile($request->file('file')->getRealPath())->getSecurePath(); // Upload an existing remote file to Cloudinary with one line of code.$uploadedFileUrl = cloudinary()->uploadFile($remoteFileUrl)->getSecurePath(); // Store the uploaded file on Cloudinary.$result = $request->file('file')->storeOnCloudinary(); // Store the uploaded file on Cloudinary.$result = $request->file->storeOnCloudinary(); // Store the uploaded file in the "lamborghini" directory on Cloudinary.$result = $request->file->storeOnCloudinary('lamborghini'); // Store the uploaded file in the "lamborghini" directory on Cloudinary with the file name "prosper."$result = $request->file->storeOnCloudinaryAs('lamborghini', 'prosper');Image Compression and Resizing
To learn how to resize and compress images in Laravel apps with Cloudinary’s Laravel SDK, see my September 20 post.
Association of Media Files With Eloquent Models
To attach media files to Laravel’s Eloquent models on the fly, all you need is this simple code:
$page = Page::create($this->request->input());$page->attachMedia($file); $page = Page::find(2);$page->attachMedia($file); $filesBelongingToSecondPage = Page::find(2)->fetchAllMedia();For details, see my October 6 post.
Cloudinary’s Media-Management Capabilities
Cloudinary helps you administer the entire spectrum of your media’s lifecycle, end to end, from upload and transformation to optimization and delivery. Do check it out.