Laravel Tutorial: Step by Step Guide to Building Your First Laravel Application
Published on by Eric L. Barnes

Since its initial release in 2011, Laravel has experienced exponential growth. In 2015, it became the most starred PHP framework on GitHub and rose to the go-to framework for people all over the world. If you'd like to learn more about the history, check out what is Laravel.
Laravel focuses on the end-user first: which means it focus is on simplicity, clarity, and getting work done. People and companies are using it to build everything from simple hobby projects all the way to Fortune 500 companies.
My goal with this Laravel tutorial to create a guide for those just learning Laravel. This guide will take you from the very beginning of an idea into a real deployable application. If you’d prefer to read this as an ebook you can join our weekly Laravel Newsletter and get it for free.
This look at Laravel will not be exhaustive, but if you want a more exhaustive introduction I recommend the book Laravel: Up and Running. This tutorial does expect a few prerequisites and here is what you will need to follow along:
- A local PHP environment (Valet, Homestead, Vagrant, MAMP, etc.).
- A database (I’ll be using MySQL)
- PHPUnit installed.
- Node JS installed.
Note: For the local PHP development I Recommend Mac OSX and Valet because it automatically sets everything up. If you are on Windows, consider Homestead or some flavor of a virtual machine. Another option is a community-provided Windows port of Valet.
I am attempting to go through the process of creating a new application just as I would in a real-world environment. In fact, the code and idea are from a project I built.
Planning
Every project has to start somewhere; either a project assignment at work or just an idea in your head. No matter where it originates, thoroughly planning out all the features before you start coding is paramount in completing a project.
How you plan is dependent on how your mind works. As a visual person, I like to plan on paper, drawing out the way I picture the screens looking and then working backward into how I would code it. Others prefer to write a project plan in a text file, wiki, or some mind mapping tool. It doesn’t matter how you plan, just that you do it.
For this guide, we are going to be building a link directory. Here is a list of fundamental goals for this links app:
- Display a simple list of links.
- Create a form where people can submit new links.
- Validate the form.
- Insert the data into the database.
Let’s get started!
The First Steps
With a simple plan of attack outlined, it’s time to get a brand new empty project up and running. I like to put all my projects in a ~/Sites directory, and these instructions will use that location. I’ve already “parked” this directory in Valet, so any folders will automatically be mapped to “foldername.test” in the browser.
Open your terminal application and switch into this directory.
mkdir ~/Sitescd ~/SitesLaravel provides a convenient installer. If you’re planning on writing Laravel apps, follow the installation documentation for details on setting up the installer.
Whether you set up the installer or want to use composer, run one of the following to create a new Laravel project for the links application:
# Via the installerlaravel new links # Via composercomposer create-project --prefer-dist laravel/laravel links "7.*"This will create a new directory at ~/Sites/links and install a new Laravel project.
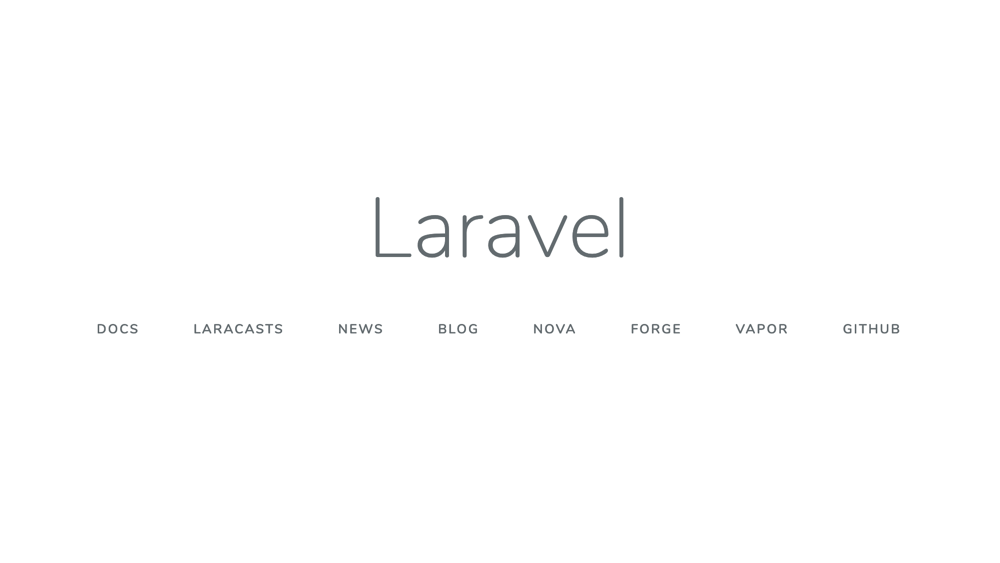
Visiting links.test in the browser now shows the default Laravel welcome page:
Database Setup
When you create a new Laravel project, the installation process automatically creates a .env file (copied from the .env.example file) for configuration and credentials. Depending on your setup, you’ll need to modify the following block of settings to match your database configuration:
DB_CONNECTION=mysqlDB_HOST=127.0.0.1DB_PORT=3306DB_DATABASE=laravelDB_USERNAME=rootDB_PASSWORD=You may want to create a new database for this project:
# Connect via the mysql CLImysql -u root -pmysql> create database links_development;mysql> exit # Or use the -e flag to run the create commandmysql -u root -e'create database links_development'You would then want to adjust the database configuration in .env:
DB_CONNECTION=mysqlDB_HOST=127.0.0.1DB_PORT=3306DB_DATABASE=links_developmentDB_USERNAME=rootDB_PASSWORD=The best way to test your database connection is running the migrate artisan command:
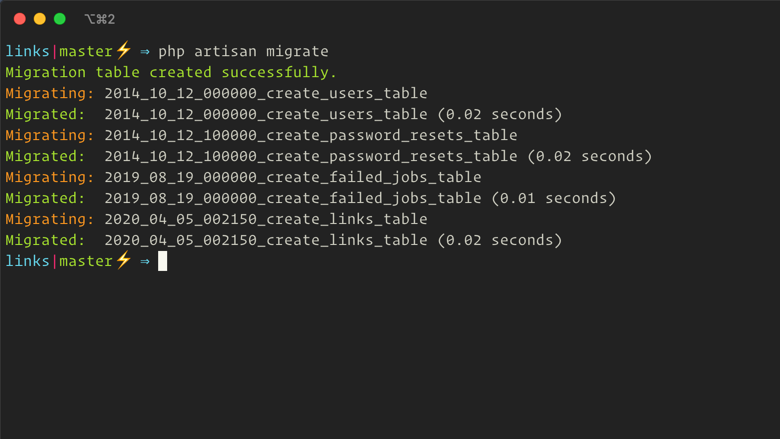
php artisan migrateIf everything went according to plan, you should see something like the following after running the migrate command:
Authentication Scaffolding
Laravel has a separate first-party package for generating common scaffolding that makes setting up authentication a breeze. To use it, we need to install the UI composer package:
composer require laravel/uiThe UI package provides a few commands for setting up scaffolding for tools like React, Vue, and Bootstrap. We’ll create simple auth scaffolding for this project, but feel free to follow the frontend setup documentation.
Run the following to generate routes, controllers, views, and other files necessary for auth:
php artisan ui bootstrap --authLast, we need to compile our CSS UI with the following:
npm install # Build dev assetsnpm run dev # Or use a watcher to automatically update changesnpm run watchThe watch command will listen for files changes to JS and CSS files, and automatically update them. You probably want to have npm run watch running in a separate tab while developing.
Even though this tutorial will not dive into authentication by running this command, it will modify our views and routes. So by doing it early, we don’t have to worry about it messing with any of our code.
With the basics set up and working, it’s time to start doing some coding.
Building a List of Links
If you start thinking about a finished project, it’s easy to get overwhelmed. The best way to fight this is to break the project down into small tasks. So, let’s start by showing a list of links.
Even though showing a list of links sounds like a small task it still requires a database, a database table, data in the table, a database query, and a view file.
Creating a migration will be the first step, and the Laravel Artisan command line tool can help us build that.
php artisan make:migration create_links_table --create=linksNow, open the file this command created. It will be located at database/migrations/{{datetime}}_create_links_table.php. You’ll notice a few other migrations in this folder as well, which the framework provides.
Inside the “up()” method, add the following schema:
Schema::create('links', function (Blueprint $table) { $table->increments('id'); $table->string('title'); $table->string('url')->unique(); $table->text('description'); $table->timestamps();});Save the file and run the migration:
php artisan migrateWhile you are working with test data, you can quickly apply the schema:
php artisan migrate:freshNext, we need some data and a model to work with our database table. Laravel provides two features to help with this, the first is a database seeder, which populates the database with data, and second, the model factory files that allow us to generate fake model data that we can use to fill our development database and tests:
php artisan make:model --factory LinkThe make:model command creates an app/Link.php model file. Laravel models provide a powerful database API called Eloquent, which you can explore in great detail in the Eloquent documentation.
The --factory flag will generate a new factory file in the database/factories path for generating app data. In our case, a new LinkFactory file will include an empty factory definition for our Link model.
Open the LinkFactory.php file and fill in the following:
<?php /** @var \Illuminate\Database\Eloquent\Factory $factory */ use App\Link;use Faker\Generator as Faker; $factory->define(Link::class, function (Faker $faker) { return [ 'title' => substr($faker->sentence(2), 0, -1), 'url' => $faker->url, 'description' => $faker->paragraph, ];});We use the $faker->sentence() method to generate a title, and substr to remove the period at the end of the sentence.
Next, create the link seeder, so we can easily add demo data to the table:
php artisan make:seeder LinksTableSeederThe make:seeder command generates a new database class to seed our links table with data.
Open the database/seeds/LinksTableSeeder.php file and add the following:
public function run(){ factory(App\Link::class, 5)->create();}In order to “activate” the LinksTableSeeder, we need to call it from the main database/seeds/DatabaseSeeder.php run method:
public function run(){ $this->call(LinksTableSeeder::class);}You can now run the migrations and seeds to add data to the table automatically. Using the migrate:fresh command, we can get a clean schema that applies all migrations and then seeds the database:
$ php artisan migrate:fresh --seedDropped all tables successfully.Migration table created successfully.Migrating: 2014_10_12_000000_create_users_tableMigrated: 2014_10_12_000000_create_users_tableMigrating: 2014_10_12_100000_create_password_resets_tableMigrated: 2014_10_12_100000_create_password_resets_tableMigrating: 2017_11_03_023418_create_links_tableMigrated: 2017_11_03_023418_create_links_tableSeeding: LinksTableSeederUsing the tinker shell you can start playing around with the model data:
$ php artisan tinker>>> \App\Link::first();=> App\Link {#3060 id: 1, title: "Rerum doloremque", url: "http://russel.info/suscipit-et-iste-debitis-beatae-repudiandae-eveniet.html", description: "Dolorem voluptas voluptatum voluptatem consequuntur amet dolore odit. Asperiores ullam alias vel soluta ut in. Facere quia et sit laudantium culpa ea possimus.", created_at: "2020-04-05 00:44:33", updated_at: "2020-04-05 00:44:33", }>>>We have the data place and a model to interact with the database! Let’s start building the UI to add new links to the application.
Routing and Views
To build out a view showing the list of links, we need to update the main project route and also define a new route that will display our submission form. We can add new routes to our application in the routes/web.php file.
In the web routes file you should see the default route below:
Route::get('/', function () { return view('welcome');});To create a new route, we can either use a route closure or a dedicated controller class. In this tutorial, we will use closures for our submission and index routes.
First, let’s update the home route by getting a collection of links from the database and passing them to the view:
Route::get('/', function () { $links = \App\Link::all(); return view('welcome', ['links' => $links]);});The second argument can be an associative array of data, and the key ends up being the variable name in the template file.
You can also use a fluent API to define variables if you prefer:
// with()return view('welcome')->with('links', $links); // dynamic method to name the variablereturn view('welcome')->withLinks($links);Next, edit the welcome.blade.php file and add a simple foreach to show all the links:
@foreach ($links as $link) <a href="{{ $link->url }}">{{ $link->title }}</a>@endforeachHere’s what the welcome.blade.php HTML should look like:
<body> <div class="flex-center position-ref full-height"> @if (Route::has('login')) <div class="top-right links"> @auth <a href="{{ url('/home') }}">Home</a> @else <a href="{{ route('login') }}">Login</a> <a href="{{ route('register') }}">Register</a> @endauth </div> @endif <div class="content"> <div class="title m-b-md"> Laravel </div> <div class="links"> @foreach ($links as $link) <a href="{{ $link->url }}">{{ $link->title }}</a> @endforeach </div> </div> </div></body>If you refresh your browser, you should now see the list of all the links added. With that all set, let’s move to submitting links.
Displaying the Link Submission Form
We are almost done creating our first application in Laravel!
We will round out this Laravel tutorial with the ability for others to submit links into the app, which requires three fields: title, URL, and a description.
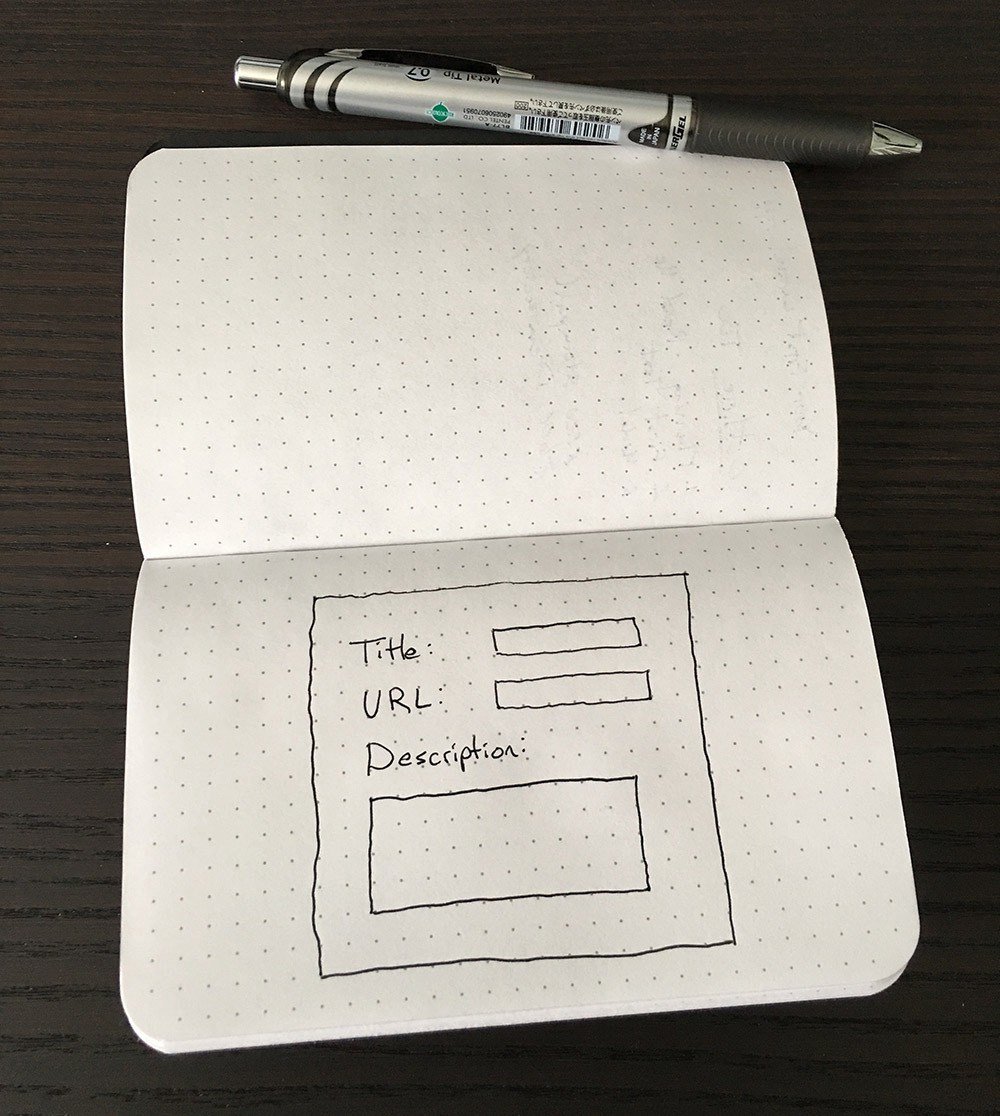
I am a visual person, and before planning out features requiring HTML, I like to draw them out so I can get an idea of what I’m building in my head. Here is a simple drawing of this form:
Since we’ve added all the core structure, model factory, migration, and model, in the last section, we can reap the benefits by reusing all those for this section.
First, create a new route in the routes/web.php file:
Route::get('/submit', function () { return view('submit');});Next, we need to create the submit.blade.php template at resources/views/submit.blade.php with the following boilerplate bootstrap markup:
@extends('layouts.app')@section('content') <div class="container"> <div class="row"> <h1>Submit a link</h1> </div> <div class="row"> <form action="/submit" method="post"> @csrf @if ($errors->any()) <div class="alert alert-danger" role="alert"> Please fix the following errors </div> @endif <div class="form-group"> <label for="title">Title</label> <input type="text" class="form-control @error('title') is-invalid @enderror" id="title" name="title" placeholder="Title" value="{{ old('title') }}"> @error('title') <div class="invalid-feedback">{{ $message }}</div> @enderror </div> <div class="form-group"> <label for="url">Url</label> <input type="text" class="form-control @error('url') is-invalid @enderror" id="url" name="url" placeholder="URL" value="{{ old('url') }}"> @error('url') <div class="invalid-feedback">{{ $message }}</div> @enderror </div> <div class="form-group"> <label for="description">Description</label> <textarea class="form-control @error('description') is-invalid @enderror" id="description" name="description" placeholder="description">{{ old('description') }}</textarea> @error('description') <div class="invalid-feedback">{{ $message }}</div> @enderror </div> <button type="submit" class="btn btn-primary">Submit</button> </form> </div> </div>@endsectionThere’s quite a bit going on in this form, so let’s go over the major points that might be confusing when you are new to Laravel.
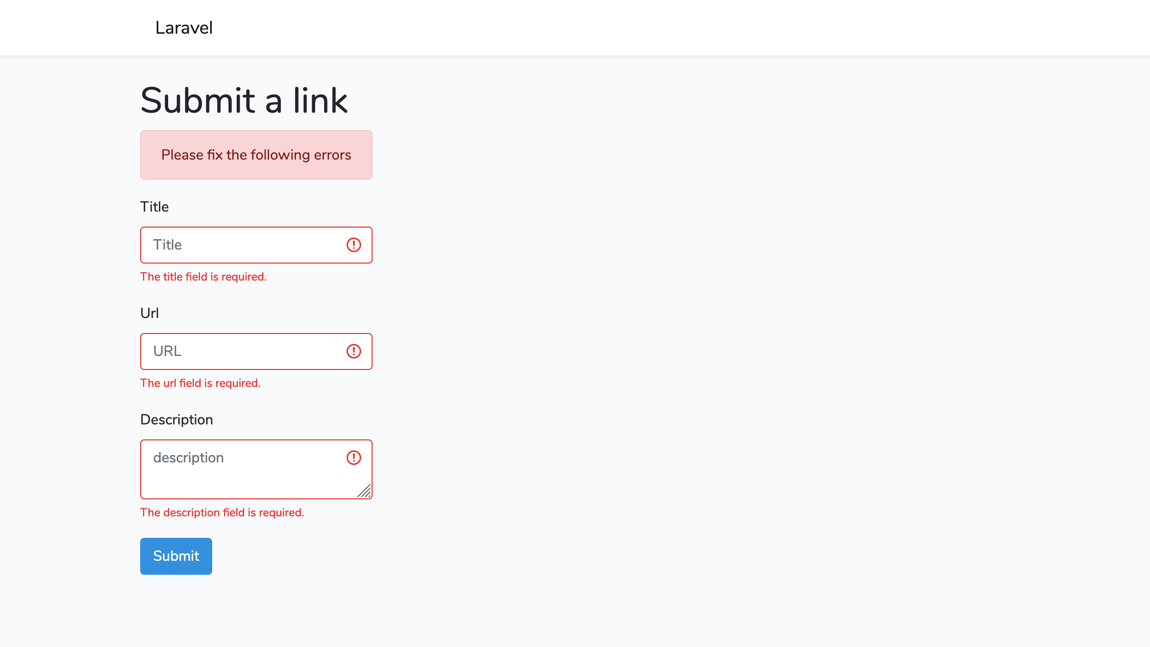
Near the top of the form, we have a blade conditional that checks to see if there are any validation errors. When errors exist, the bootstrap alert message will be shown, prompting the user to fix the invalid form fields:
@if ($errors->any()) <div class="alert alert-danger" role="alert"> Please fix the following errors </div>@endifEach individual form field checks for validation errors and displays an error message and outputs a has-error class:
<div class="form-group"> <label for="title">Title</label> <input type="text" class="form-control @error('title') is-invalid @enderror" id="title" name="title" placeholder="Title" value="{{ old('title') }}"> @error('title') <div class="invalid-feedback">{{ $message }}</div> @enderror</div>If the user submits invalid data, the route will store validation in the session and redirect the user back to the form. The {{ old('title') }} function will populate the originally submitted data. If a user forgot to submit one of the fields, the other fields that have data would be populated after validation fails and errors are shown.
If a field has an error, the @error directive provides an error message variable you can use within the directive block:
@error('title') <div class="invalid-feedback">{{ $message }}</div>@enderrorAnother way to check and dispay errors involves the $error variable provided to the view after a validation failure and redirect:
@if($errors->has('title')) <div class="invalid-feedback">{{ $errors->first('title') }}</div>@endifThe @error directive uses the same variable under the hood, feel free to use whichever method you prefer.
Submitting the Form
With the form in place, we are ready to handle sending and validating form data on the server. Back in the routes/web.php file, create another route for the POST request:
use Illuminate\Http\Request; Route::post('/submit', function (Request $request) { $data = $request->validate([ 'title' => 'required|max:255', 'url' => 'required|url|max:255', 'description' => 'required|max:255', ]); $link = tap(new App\Link($data))->save(); return redirect('/');});Note: make sure you add use Illuminate\Http\Request near the top of web.php.
This route is a little more complicated than the others.
First, we are injecting the Illuminate\Http\Request object, which holds the POST data and other data about the request.
Next, we use the request’s validate() method to validate the form data. The validate method was introduced in Laravel 5.5 and is a nice shortcut over other methods used for validation. As a bonus, the validated fields are returned to the $data variable, and we can use them to populate our model.
We require all three fields, and using the pipe character we can define multiple rules. All three rules can have a max of 255 characters, and the url field requires a valid URL.
If validation fails, an exception is thrown, and the route returns the user with the original input data and validation errors.
Next, we use the tap() helper function to create a new Link model instance and then save it. Using tap allows us to call save() and still return the model instance after the save.
Typically, you would have to do the following without tap, it just adds a little syntactic sugar:
$link = new \App\Link($data);$link->save(); return $link;If we want to populate a new model with data, we need to allow the fields to be “fillable” via mass assignment. The fillable property is designed to prevent fields from being mass-assigned except for the items you define in the array.
Think about this for a minute: we are taking user input from the request and mass assigning the values on the database model. Be aware of the dangers of user-submitted data and take care to guard against data you don’t intend the user to directly manipulate via a form.
In our case, we are validating each field so allowing them to be mass-assigned is safe. To allow our model to assign values to these fields, open the app/Link.php file and update it to look like the following:
<?php namespace App; use Illuminate\Database\Eloquent\Model; class Link extends Model{ protected $fillable = [ 'title', 'url', 'description' ];}If we wanted to avoid mass-assignment, this is how our code might look:
$data = $request->validate([ 'title' => 'required|max:255', 'url' => 'required|url|max:255', 'description' => 'required|max:255',]); $link = new \App\Link;$link->title = $data['title'];$link->url = $data['url'];$link->description = $data['description']; // Save the model$link->save();The last thing we do in our POST route redirects the user back to the home page after saving the link successfully.
At this point, our form should prevent submitting links with invalid fields:
If the form passes validation, the data should be saved in the database and the user redirect back to the homepage.
Testing the Form Submission
We have a basic working form, but we should make sure it continues to work by writing tests.
Laravel makes HTTP testing a breeze for performing integration tests against routes and middleware, so let’s write a few feature tests to verify our code works as expected.
Before we get started, we need to adjust a few things in our phpunit.xml file so that we can use an in-memory SQLite database. You will need to make sure that you have the proper PHP modules installed.
As of Laravel 7, the project’s phpunit.xml file configures an in-memory SQLite database. If you’re using an older version of Laravel, change the database connection by adding the following:
<php> <!-- ... --> <env name="DB_CONNECTION" value="sqlite"/> <env name="DB_DATABASE" value=":memory:"/> <!-- ... --></php>Next, remove the placeholder test that ships with Laravel:
rm tests/Feature/ExampleTest.phpWe are ready to start testing the /submit form through HTTP requests to make sure that the route validation, saving, and redirecting are working as expected.
First, let’s create a new feature test to test against our route:
php artisan make:test SubmitLinksTestThe command creates a new testing file with the proper dependencies, including a RefreshDatabase trait that we are going to use to verify that our links are being saved to the database when valid.
Open the new tests/Feature/SubmitLinksTest.php file and let’s define a few skeleton tests in the body of the class that we are going to flesh out:
/** @test */function guest_can_submit_a_new_link() {} /** @test */function link_is_not_created_if_validation_fails() {} /** @test */function link_is_not_created_with_an_invalid_url() {} /** @test */function max_length_fails_when_too_long() {} /** @test */function max_length_succeeds_when_under_max() {}These tests should give you a high-level overview of what we are going to test:
- Verify that valid links get saved in the database
- When validation fails, links are not in the database
- Invalid URLs are not allowed
- Validation should fail when the fields are longer than the
max:255validation rule - Validation should succeed when the fields are long enough according to
max:255.
We might be missing some things, but for your first Laravel application, this is a decent list that should illustrate some basic HTTP testing techniques in Laravel.
Saving a valid link
The first test we’ll write is the test that verifies that valid data gets stored in the database:
<?php namespace Tests\Feature; use Illuminate\Validation\ValidationException;use Tests\TestCase;use Illuminate\Foundation\Testing\RefreshDatabase; class SubmitLinksTest extends TestCase{ use RefreshDatabase; /** @test */ function guest_can_submit_a_new_link() { $response = $this->post('/submit', [ 'title' => 'Example Title', 'url' => 'http://example.com', 'description' => 'Example description.', ]); $this->assertDatabaseHas('links', [ 'title' => 'Example Title' ]); $response ->assertStatus(302) ->assertHeader('Location', url('/')); $this ->get('/') ->assertSee('Example Title'); }}Take note of the RefreshDatabase trait which makes sure that each test has a new database to give each test a pristine database environment with all the migrations.
Our first test submits valid post data, which returns a response object that we can use to assert that our route responded as expected. We verify that the database contains a record with the title we just created.
Next, we verify that the response was a 302 status code with a Location header pointing to the homepage.
Last, we request the home page and verify that the link title is visible on the homepage.
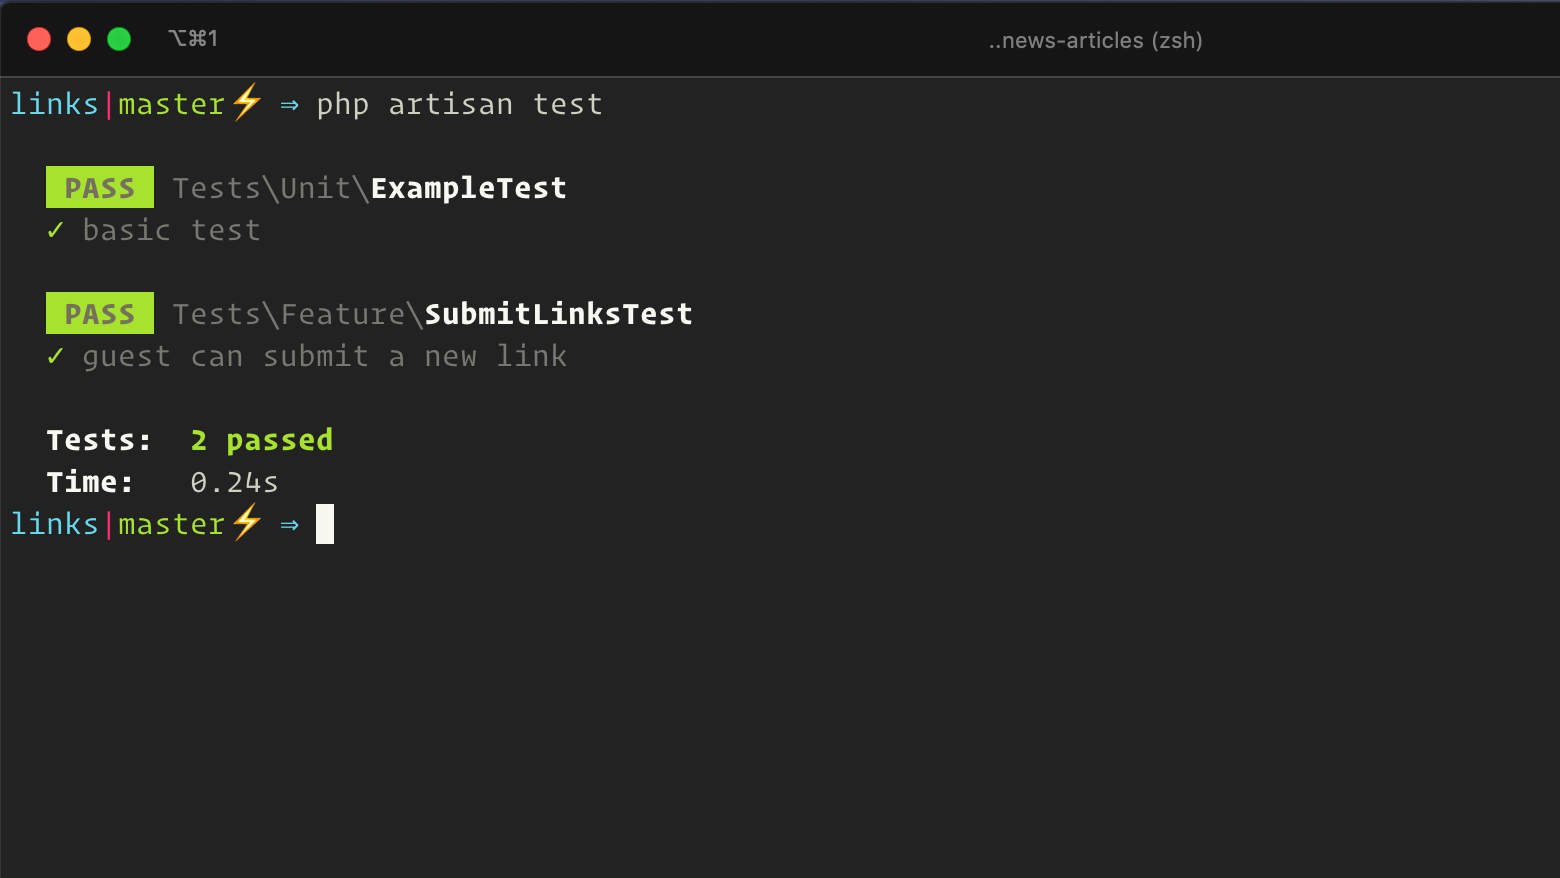
Let’s run our first test to make sure things pass as expected. Laravel 7 adds a new artisan test command, or you can use phpunit:
php artisan test # Or run phpunit directlyvendor/bin/phpunitYou should see that the test suite passes:
Testing Failed Validation
When a user generally submits bad data, we expect the validation to trigger an exception and we can use that to make sure our validation layer is working:
/** @test */function link_is_not_created_if_validation_fails(){ $response = $this->post('/submit'); $response->assertSessionHasErrors(['title', 'url', 'description']);}We use Laravel’s assertSessionHasErrors() to make sure that the session has validation errors for each of our required fields. Because we submitted empty data to the route, we expect the required rule will trigger for each field.
Let’s run the test suite to verify our work thus far:
$ php artisan test tests/Feature/SubmitLinksTest PASS Tests\Feature\SubmitLinksTest ✓ guest can submit a new link ✓ link is not created if validation fails Tests: 2 passed Time: 0.32sTesting URL Validation
We expect only valid URLs to pass validation so that our application doesn’t try to display invalid data.
/** @test */function link_is_not_created_with_an_invalid_url(){ $this->withoutExceptionHandling(); $cases = ['//invalid-url.com', '/invalid-url', 'foo.com']; foreach ($cases as $case) { try { $response = $this->post('/submit', [ 'title' => 'Example Title', 'url' => $case, 'description' => 'Example description', ]); } catch (ValidationException $e) { $this->assertEquals( 'The url format is invalid.', $e->validator->errors()->first('url') ); continue; } $this->fail("The URL $case passed validation when it should have failed."); }}Laravel has a withoutExceptionHandling() method which disables Laravel’s route exception handling code used to generate an HTTP response after an exception. We use this to our advantage so we can inspect the validation exception object and assert against the error messages.
We loop through various cases (add your own if you’d like to cover more scenarios) and catch instances of ValidationException. If the text makes it past the exception handling, we manually fail the test because we expect the route throws a ValidationExcepiton exception each time.
The catch block uses the validator object to check the url error and asserts that the actual error message matches the expected validation error message.
I like using the try/catch technique, followed by a $this->fail() as a safety harness instead of using exception annotations provided by PHPUnit. Be sure to return in the caught exception to avoid confusing test failures. I feel catching the exception allows the ability to do assertions that wouldn’t otherwise be possible and provides a more granular control that I like in most cases.
Testing Max Length Validation
We will test a few scenarios with the max:255 validations rules: when the field fails max-length validation with a length of 256 characters, and when the field is long enough to pass validation at 255 characters.
Although Laravel contains the max validation rule functionality, I like to test it to verify that my application applies the rules. If someone removes the max validation rule, then the tests will catch it.
I like to test the threshold of min and max validation rules as an extra caution to make sure my application respects the min and max boundaries I set.
First, let’s test the “max length” scenario:
/** @test */function max_length_fails_when_too_long(){ $this->withoutExceptionHandling(); $title = str_repeat('a', 256); $description = str_repeat('a', 256); $url = 'http://'; $url .= str_repeat('a', 256 - strlen($url)); try { $this->post('/submit', compact('title', 'url', 'description')); } catch(ValidationException $e) { $this->assertEquals( 'The title may not be greater than 255 characters.', $e->validator->errors()->first('title') ); $this->assertEquals( 'The url may not be greater than 255 characters.', $e->validator->errors()->first('url') ); $this->assertEquals( 'The description may not be greater than 255 characters.', $e->validator->errors()->first('description') ); return; } $this->fail('Max length should trigger a ValidationException');}Again, we disable exception handling and create data that is one character too long to pass validation.
We assert each field to make sure they all have a max length validation error message.
Last, we need to return in the caught exception and use the $this->fail() as a safety harness to fail the test.
Next, we test the “under the max” scenario:
/** @test */function max_length_succeeds_when_under_max(){ $url = 'http://'; $url .= str_repeat('a', 255 - strlen($url)); $data = [ 'title' => str_repeat('a', 255), 'url' => $url, 'description' => str_repeat('a', 255), ]; $this->post('/submit', $data); $this->assertDatabaseHas('links', $data);}We make the form data long enough to pass max:255 validation and assert that the data is in the database after submitting the data.
Run the test suite and make sure everything is passing:
$ php artisan test tests/Feature/SubmitLinksTest PASS Tests\Feature\SubmitLinksTest ✓ guest can submit a new link ✓ link is not created if validation fails ✓ link is not created with an invalid url ✓ max length fails when too long ✓ max length succeeds when under max Tests: 5 passed Time: 0.58sConclusion
Congratulations on making it through the tutorial!
This guide was designed to get you started on building your app, and you can use this as a building block to gain the skills you need to develop your application. I know this covers a lot of features and can be overwhelming if you are not familiar with the framework.
I hope this introduction to Laravel shows you why so many people are excited about the framework.
Join the weekly newsletter and check out the Laravel tutorials section of the site to go deeper and learn even more about Laravel.


