Deploying Laravel Applications on Laravel Cloud With MongoDB Atlas
Last updated on by Aasawari Sahasrabuddhe
Hosting a website or an application has always been a pain in the past. However, things got easier with time, and today, it has become seamless using Laravel Cloud. Laravel Cloud is a fully managed platform that allows you to hold the applications and host an optimised, scalable application without the pain of having server management.
In this tutorial, we will deploy a simple Laravel application on the Laravel cloud and connect with MongoDB Atlas.
The native integration of MongoDB as a database is not available at this moment in Laravel Cloud, but configuring the database is very simple as Laravel Cloud includes the MongoDB PHP extension by default. We will go through the steps on how to deploy in detail in the coming section.
Let’s get into it.
Pre-requisites
To deploy an application on the Laravel cloud, you need just a few things before we begin:
- Sign up for your first free Laravel Cloud account.
- MongoDB’s Atlas cluster. You can start by creating an Atlas cluster for free by following the documentation on Deploy a Free Cluster.
- A Laravel application connecting to MongoDB Atlas deployed on your GitHub, GitLab, or BitBucket repositories.
That's all you need. Once you are all set, deploying the application will just take a few minutes.
But before moving ahead, it is equally important to understand the Laravel cloud in detail so that we can deploy the application with ease.
Understanding Laravel Cloud
As the Laravel Cloud documentation says, Laravel Cloud is a fully managed platform as a service that allows you to deploy an optimised and scalable application with ease.
Here are a few of the important features of Laravel Cloud:
- You can deploy Laravel applications without any setup or server configuration.
- Database storage can be provisioned instantly.
- Updates are deployed with zero downtime, ensuring uninterrupted availability.
- Infrastructure can be scaled instantly without affecting application performance.
- TLS certificates and load balancing are automatically managed for security.
- Cloudflare-powered caching and DDoS protection enhance performance and security.
- Real-time monitoring and logs allow you to track application performance easily.
You can learn more about Laravel Cloud and its features by following the documentation on Welcome to Laravel Cloud.
Now, it's time to start learning the steps you need to follow to deploy your applications.
Deploying on Laravel Cloud
We will divide this section into two parts. First, we’ll configure our GitHub, GitLab, or BitBucket repositories, and second, we’ll configure the databases.
Once you have logged into the Laravel Cloud account and created your organisation, select the Sandbox which is free to get you started. Once you’re all set, click on New Application. You need to configure the control provider and repository for yourself.
As seen in the below screenshot, I have my Laravel application in the GitHub repository which is linked to the Laravel cloud. I have also selected the nearest region for myself. It is recommended that you select the same region for your MongoDB Atlas cluster and Laravel Cloud deployment. For instance, you can select ap-southeast-1(Singapore) for MongoDB Atlas and Asia Pacific(Singapore) for Laravel Cloud.
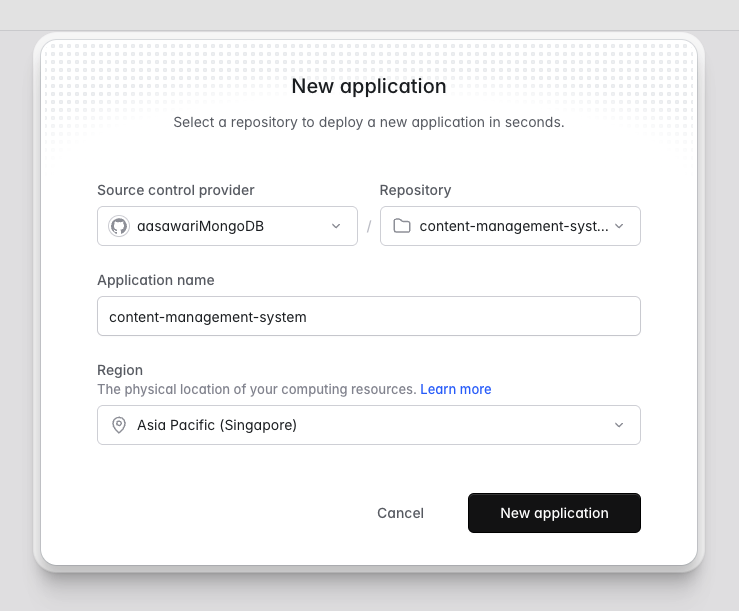
Screenshot from Laravel Cloud UI representing steps on setting up the Laravel repositories
Click on New Application, and you should see the application in the UI.
The next step is to deploy the application. To do that, click on Deploy. You should see the application being deployed in just a few seconds. In my case, it was 49 seconds. Great, right?
Click on Visit, and you should be able to see the application running.
But wait, it shows an error. ‼️
At this point, we should be able to see the logs and identify the error. As in the below image, we see ERROR: MongoDB connection configuration requires "dsn" or "host" key.
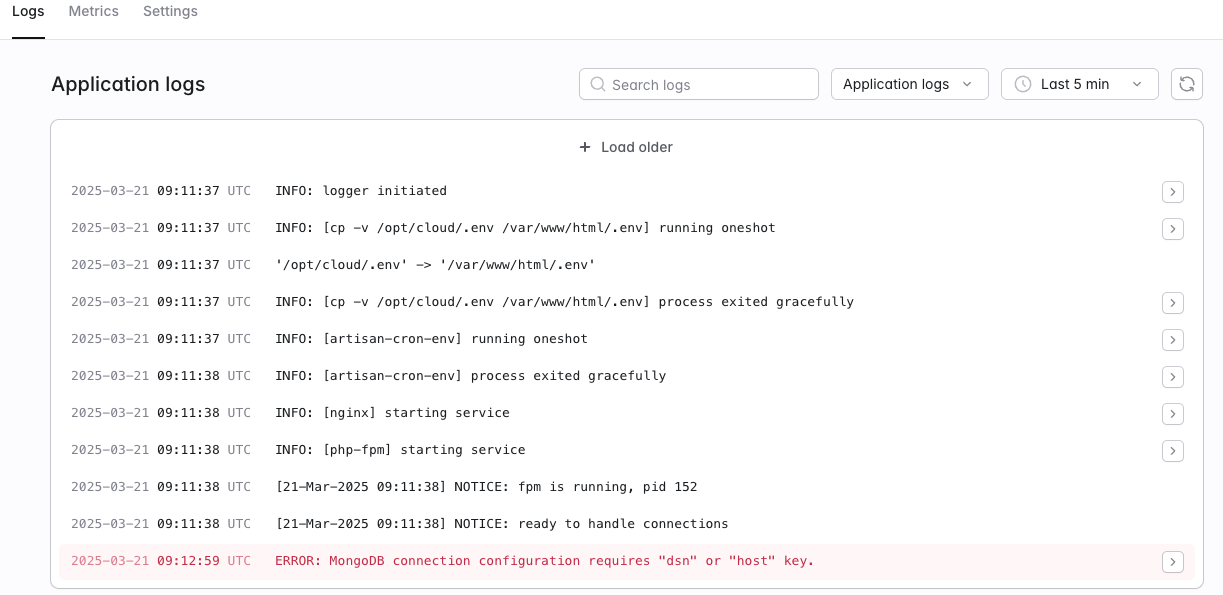 Screenshot from Laravel Cloud UI representing error logs
We have this error because we haven’t configured the database at this point. Now, let's try and understand how to configure the database.
At this point, Laravel Cloud has direct integration with Postgres and MySQL, but it also allows you to configure other databases.
To do that, all you need to do is copy the connection string from the Atlas UI, as shown in the below image.
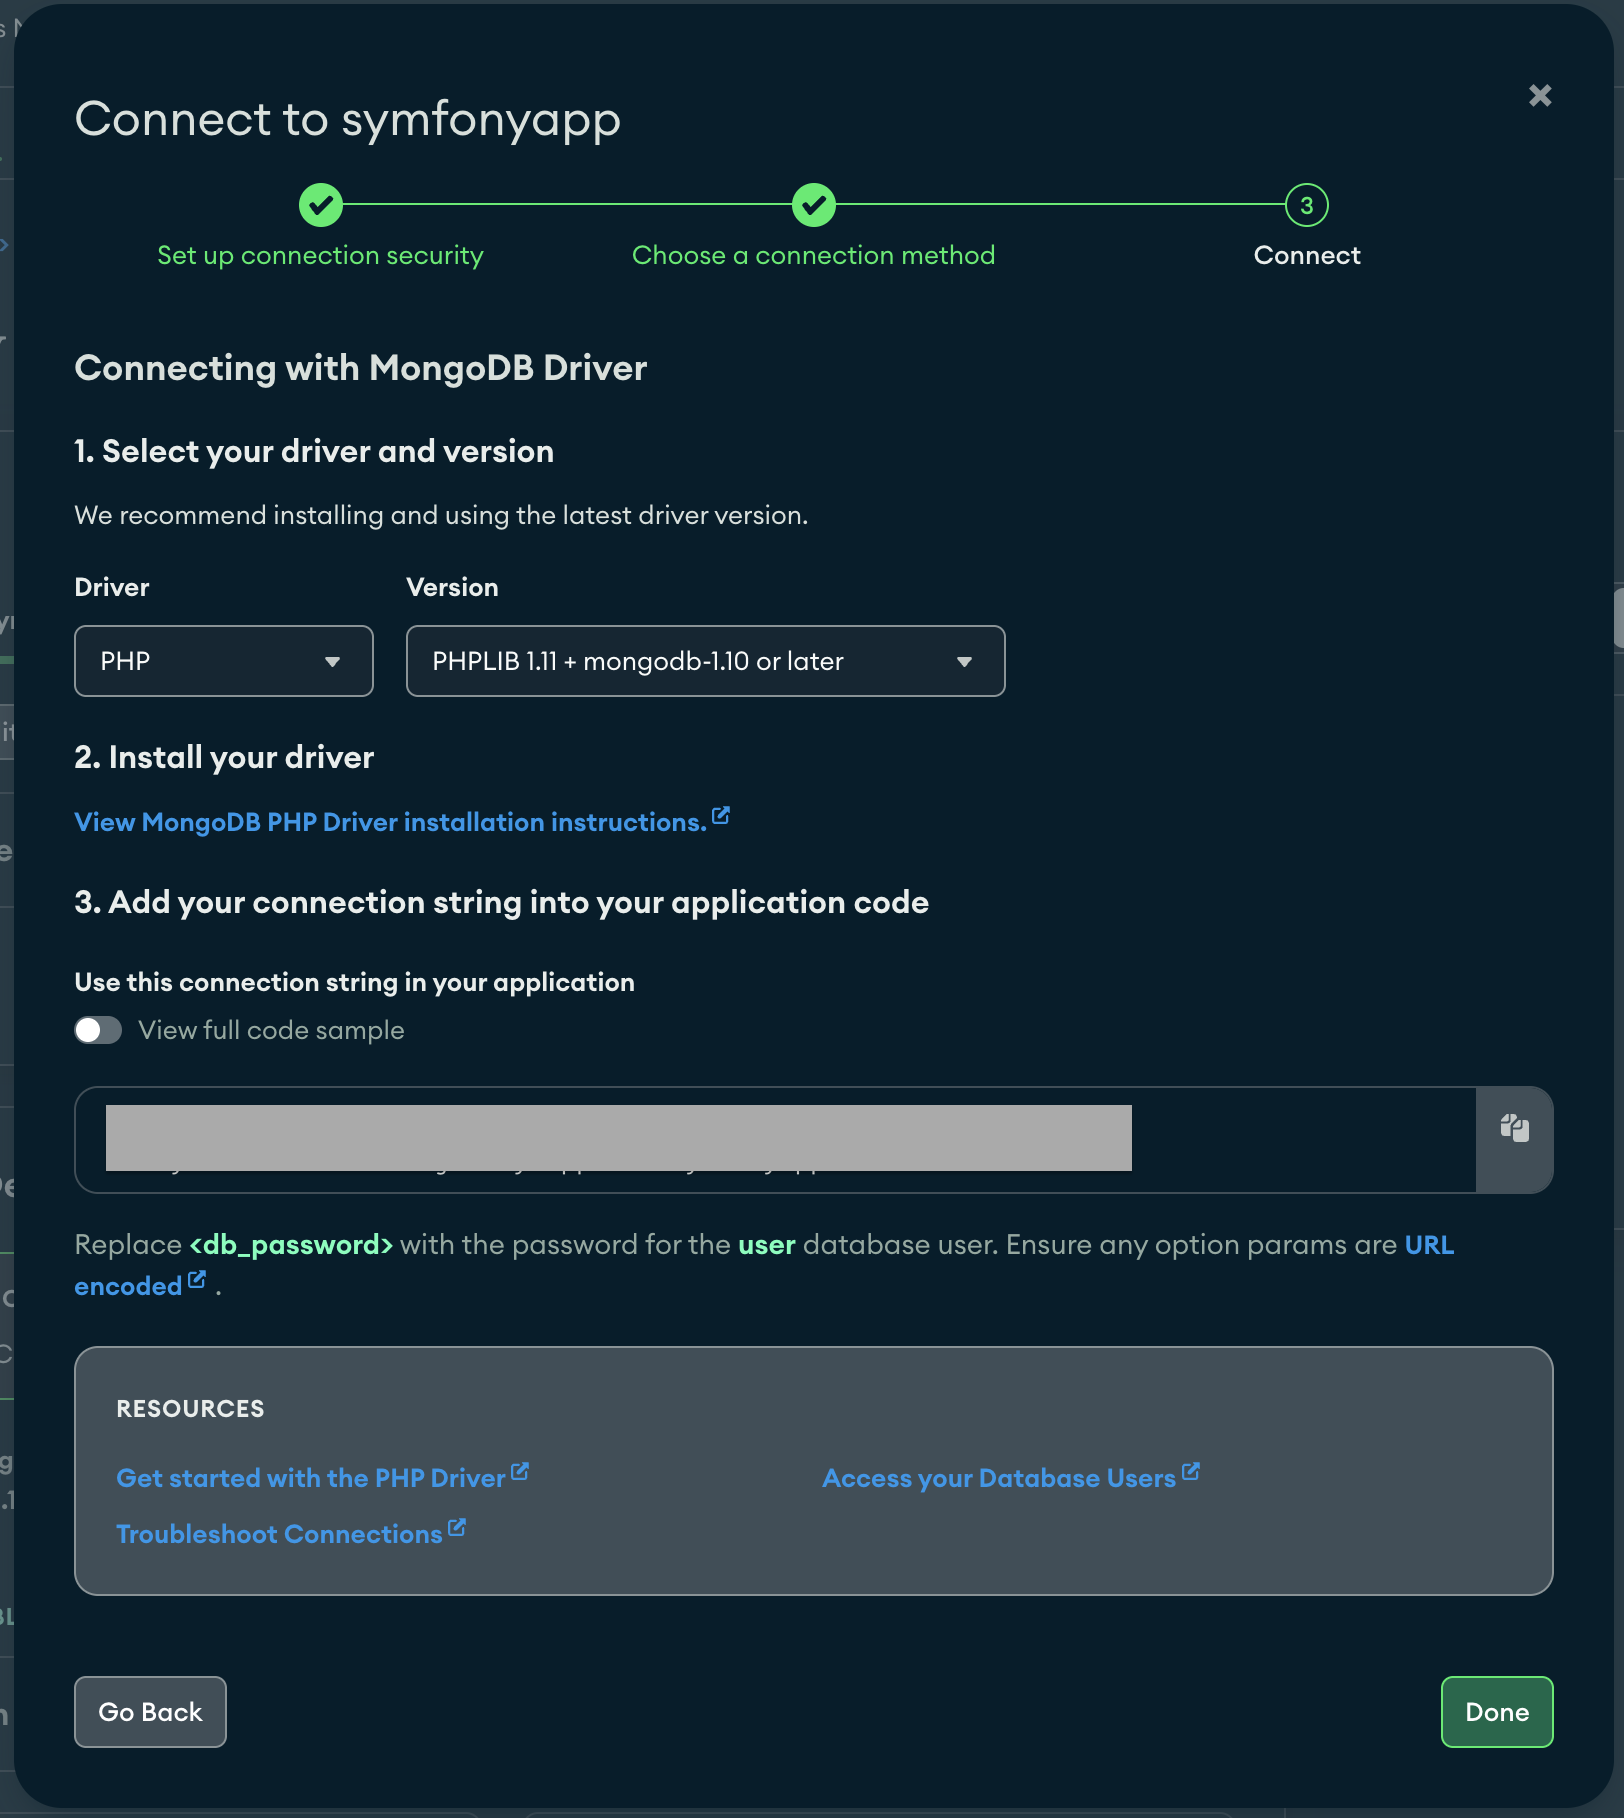 Screenshot from Atlas UI demonstrating how to copy the connection string
Once copied, go to the Laravel Cloud settings tab and click on Reveal Secrets to add your environment variable. You can use the below screenshot for reference.
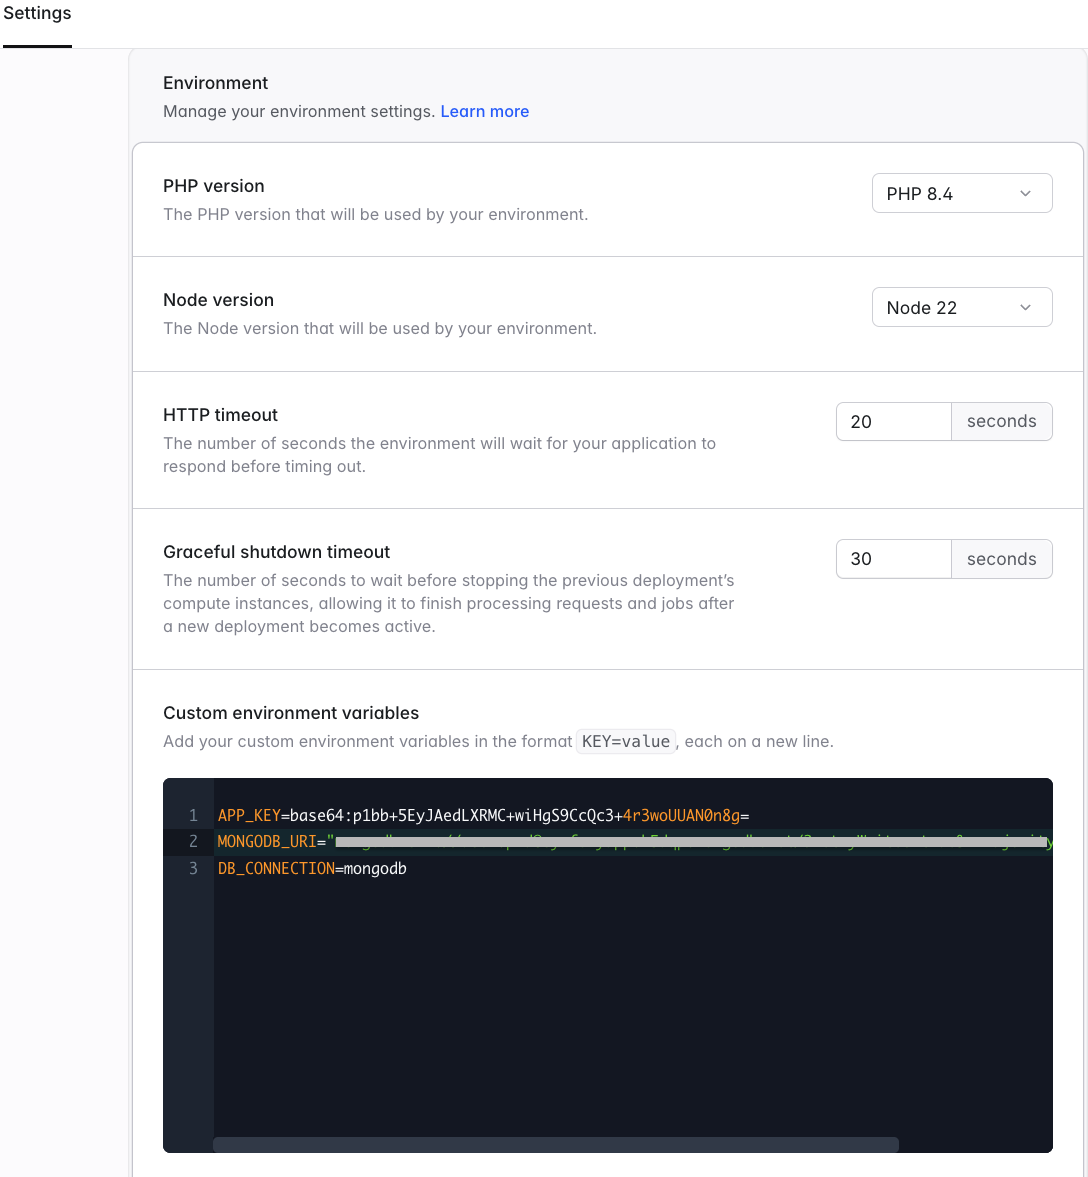 Screenshot from Laravel Cloud UI demonstrating steps to make the MongoDB connection
All you need to do at this point is save —-> redeploy —---> and voila! The application is all set and running.
Click on Visit to view your application. I have my content-management application ready with a public URL.
This was simple, right?
Deploying a Laravel application on Laravel Cloud with MongoDB Atlas is a seamless process that eliminates the complexities of server management. With just a few configurations, you can set up a highly scalable and optimized application quickly.
Conclusion
By following this tutorial, we have learned how to integrate MongoDB Atlas and leverage Laravel Cloud’s powerful features to host your Laravel application effortlessly. With real-time monitoring, automatic scaling, and built-in security, Laravel Cloud provides a robust infrastructure for modern web applications.
Now that your application is up and running, you can focus on building and enhancing its features without worrying about deployment hassles.
Ready to take it further? Explore more Laravel Cloud features, automate your deployment pipeline, and make the most of your cloud-based Laravel application with MongoDB Atlas.
You can also watch the YouTube clip here.