Laravel Jobs and Queue 101: How to run your workers on your production server
Published on by Youghourta Benali

Now that you’ve built your first queue/jobs based Laravel application from parts one and two, it is time to deploy it to a production server.
The only difference comparing to “regular” Laravel applications (I.e the ones without queues and jobs), is that we need to tell the server to run the queue:work command and keep it running even after we close our ssh connection to the server and even when we restart the server.
We will explore how we are going to do this in two different ways, the first one and it is the simplest one, is by using Forge, the de facto service to deploy Laravel applications, and then we will see how we can deploy without forge, in other terms, we will learn about what Forge is doing to make queues and workers function properly on our production server.
Deploying with forge
I’ll suppose that you have already deployed your application to forge, and I’ll focus mainly and what to do next in order to make the queue:work command work in the background.
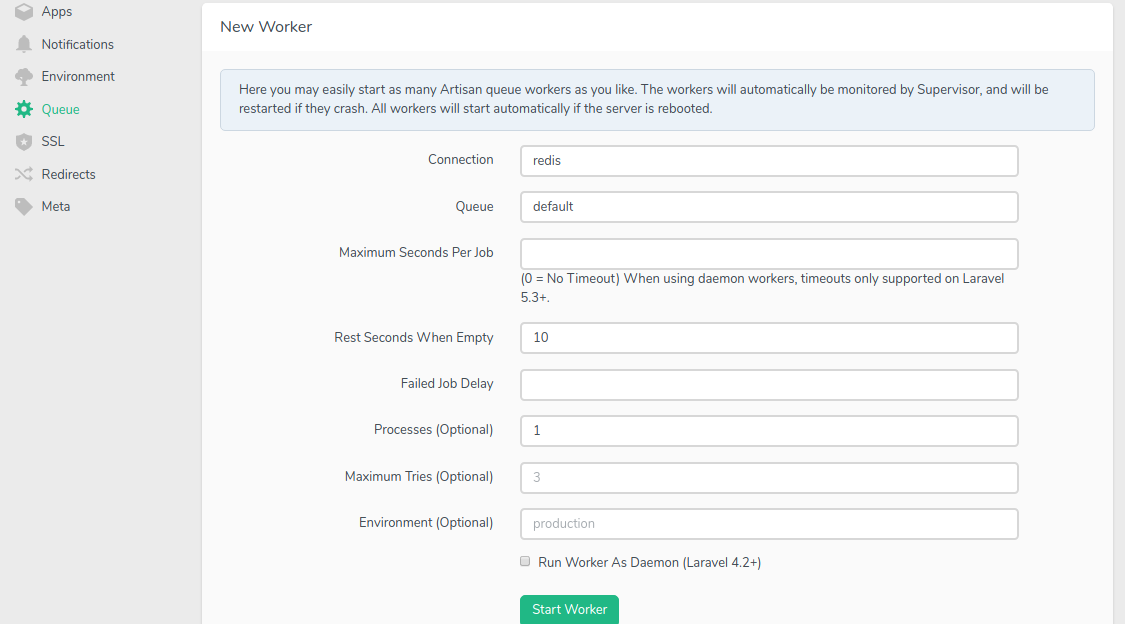
So head to your application on Forge, and then click on the “Queue” tab on the left side bar (Site Details).

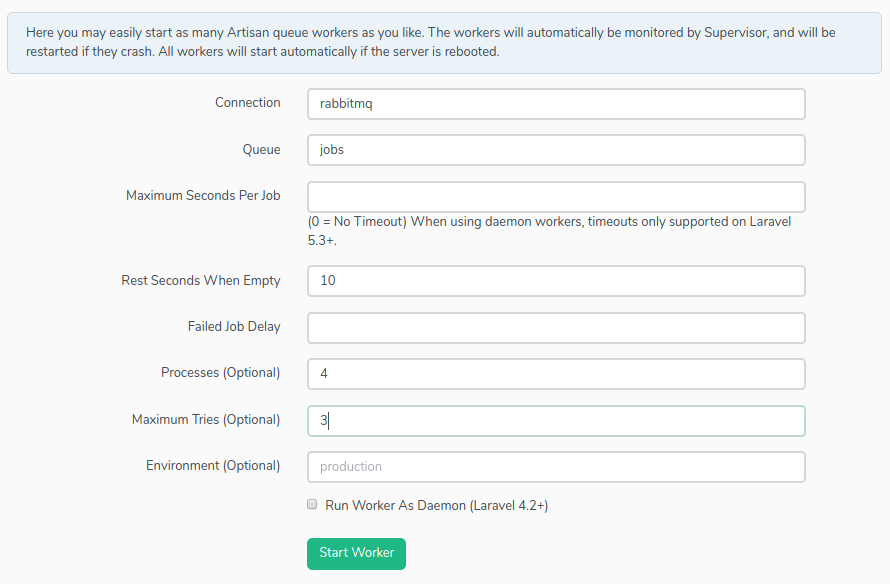
all we need to do is fill in the form in order to create our background worker(s) as follows:
PS: we do not need all the fields, these are the most important ones
Connection:rabbitmq(the name of our queue connection)Queue:jobs. In our last article we had two queues, one calledjobsand the other calledemails. We are going to create a new worker for each queue.Processes:4. here we are specifying how many background workers we want to consume the queues in parallel. In the examples we had in the previous articles we were processing one job at a time, if we have enough resources in our server and if we want to consume the queue more quickly, we can create as many processed for the same queue as we wish.Maximum Tries:3. here we are telling our application to retry the same job 3 times before we mark it as a failed job (I.e sent to thefailed_jobstable).
This also depends on the nature of your applications. In some applications you might want to retry the same job multiple times before you mark it as failed, in other application it would be more appropriate to mark a job as failed right away.

Now after you click on the “Start worker” button, it will appear in the “Active workers” table:

As you can see, you can either restart or delete the worker completely from this table.
The only issue you might notice here is that you’d need to recreate the worker from scratch in case you want to update it, even to just update the number of workers.
What’s next?
After you create the workers via Forge, you won’t need to do anything else. Even after you redeploy your application or restart your server, Forge will take care of everything, including making sure that the workers are running and restarting them after each code change.
Deploying without Laravel Forge
Deploying without Forge will show us exactly how much forge is doing behind the seen.
let’s see what are all the steps needed in order to make our workers run on our production server.
Installing Supervisor
To ensure that our queue:work command keep running all the time, we need to install a process monitor on our server like Supervisor.
If you are on Ubuntu, you can install it via this command:
sudo apt-get install supervisorConfiguring Supervisor
We need to tell Supervisor which queues we want to consume and how many workers we want to create.
In order to do that we need to create one configuration file for each queue, and store them in the /etc/supervisor/conf.d directory
Configuration files look like this (example taken from the Laravel documentation):
[program:laravel-worker]process_name=%(program_name)s_%(process_num)02dcommand=php /home/forge/app.com/artisan queue:work sqs --sleep=3 --tries=3autostart=trueautorestart=trueuser=forgenumprocs=8redirect_stderr=truestdout_logfile=/home/forge/app.com/worker.logstopwaitsecs=3600Here is the configuration file that will recreate the same configuration we created in the previous section using forge
[program:jobs-worker]process_name=%(program_name)s_%(process_num)02dcommand=php /home/djug/basic-analytics-v01/artisan queue:work rabbitmq --queue=jobs --tries=3autostart=trueautorestart=trueuser=djugnumprocs=4redirect_stderr=truestdout_logfile=/home/djug/basic-analytics-v01/worker.logAfter you add all the configuration files you need, you’d need to execute the following commands in order to take the new changes into consideration:
sudo supervisorctl rereadsudo supervisorctl updatesudo supervisorctl start allYou’d need to do the same each time you update your configuration files
Conclusion
In this series, we explored all the subjects that will allow you to create a jobs-based Laravel application. We saw how we would create Laravel jobs and how to use different queue connections to handle them. We also saw what we need to do in order to make our workers function properly in our production server.
Back-end developer http://youghourta.com I built:
- botmarker.com
- bookmarkingBot.com
- todocol.com
I'm also the author of "Laravel Testing 101" http://laraveltesting101.com


