In the previous article of this series, I talked you through my process of putting everything needed in place to start building out the frontend. This article will build on that groundwork to complete the user interface of the package.
What Should the User Interface Do?
First things first, we need to define the scope of the task. What is the purpose of the user interface and what should it allow users to do? Sometimes, with this kind of task, it can be challenging to limit the scope. Luckily for me, this is a tool I have needed for a long time, so I have a really good idea of the minimum needed to solve my issue:
- List all languages
- Create new languages
- List all translations for a language
- Switch active language for translations
- Search all keys and translations
- Add new translations
- Update existing translations
As I mentioned in the last article, I am happy building this tool predominantly using the Laravel backend to handle the heavy lifting. Call me old-fashioned but I actually like the visual cue of a page load to let me know something is happening. The only place I might not want a page load is when updating an existing translation – it would be more elegant if this happened behind the scenes.
Routing
Based on the list above, it looks like we need to define seven routes.
- GET /languages
- GET /languages/create
- POST /languages
- GET /languages/{language}/translations
- GET /languages/{language}/translations/create
- POST /languages/{language}/translations
- PUT /languages/{language}/translations
Controllers
In the controllers, we heavily lean on the class built earlier in the series. In fact, we will resolve this from Laravel’s container in the constructor of the controller.
public function __construct(Translation $translation){ $this->translation = $translation;}Now, interacting with the translations in the controllers is a relatively simple task. For instance, getting a list of languages to pass to the view is as easy as this:
public function index(Request $request){ $languages = $this->translation->allLanguages(); return view('translation::languages.index', compact('languages'));}Note You might notice the unusual view path above containing translation::. This just tells Laravel to load the views from the package namespace defined in our service provider.
$this->loadViewsFrom(__DIR__.'/../resources/views', 'translation');The only complex controller method is the translation index. This is complex because we will not only list translations but also add the search and filter functionality.
$translations = $this->translation->filterTranslationsFor($language, $request->get('filter')); if ($request->get('group') === 'single') { $translations = $translations->get('single'); $translations = new Collection(['single' => $translations]);} else { $translations = $translations->get('group')->filter(function ($values, $group) use ($request) { return $group === $request->get('group'); }); $translations = new Collection(['group' => $translations]);} return view('translation::languages.translations.index', compact('translations'));Here, we get the filtered translations from our translation service using the search term passed in from the user. We then determine if need to filter for only single or group type translations, and filter the returned collection accordingly, before passing to the view.
Views & Assets
Each view extends from a main layout.blade.php file which includes the HTML scaffolding and links to our Javascript and CSS assets built using Laravel Mix.
Styling
For those of you who don’t know, Tailwind CSS is a utility first framework. It provides a series of low-level classes which can be layered together to produce complex designs. Have a look at the documentation for more information. Here is my approach to harnessing the power of Tailwind.
Tailwind ships with a configuration file which makes it easy to set the base color palette and default fonts. This file ships with some really nice defaults, so quite often I don’t make any changes at all unless it’s imperative I bring through some branding.
Typically, I will start by applying utility classes to my HTML elements until it looks the way I want. If this is an element I don’t need to reuse, I will quite often leave it that way in the markup.
<div class="bg-red-lightest text-red-darker p-6 shadow-md" role="alert"> <div class="flex justify-center"> <p>{!! Session::get('error') !!}</p> </div></div>However, if it is something I will reuse in multiple places across my application, I will use Tailwind’s @apply directive to extract the utilities into a custom component class.
// before<div class="p-4 text-lg border-b flex items-center font-thin"> {{ __('translation::languages.languages') }}</div> // after.panel-header { @apply p-4 text-lg border-b flex items-center font-thin} <div class="panel-header"> {{ __('translation::languages.languages') }}</div>In the last article, I explained how to wire PostCSS and Tailwind’s custom PostCSS plugin into Laravel Mix’s build pipeline. When this plugin runs, it will look for the @apply directive in the project’s CSS files, pull in the styles from the utilities it finds and inject them into the containing class.
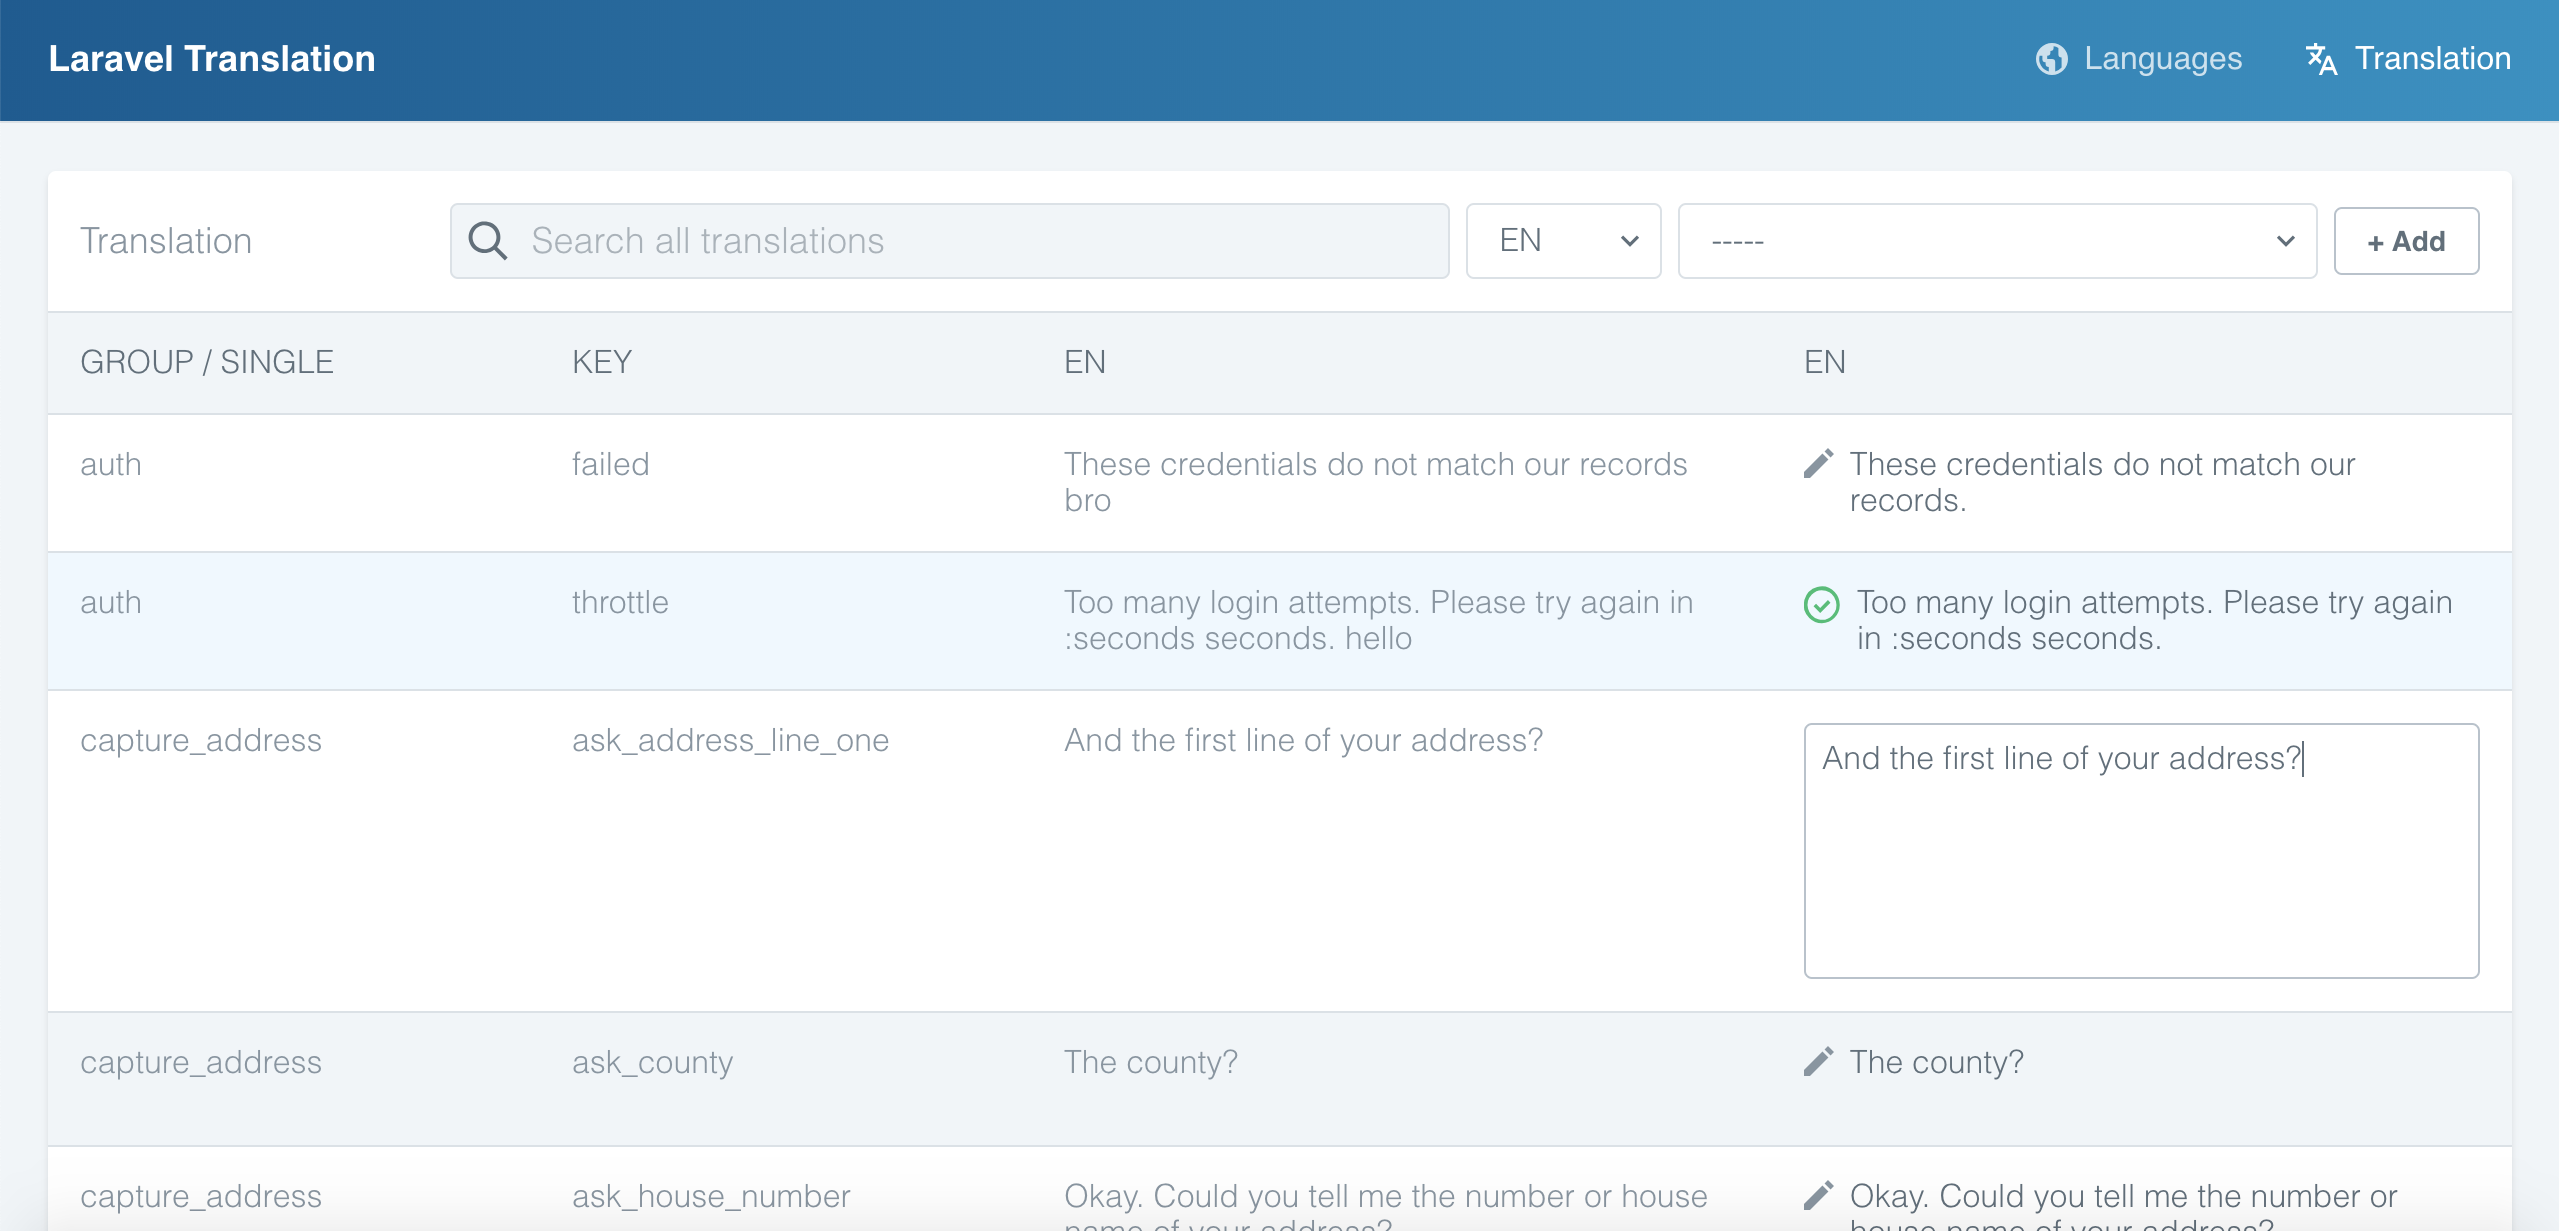
The following image shows the styling of the user interface I created with Tailwind.
Javascript
As mentioned previously in this series, we’re going to let the backend do a lot of the hard work on this project. This way, we can concentrate on only using Javascript where it enhances the user experience.
Translating content can be a tiresome task, so we want to make sure the translation experience is as slick and streamlined as possible for our users. One area I think Javascript can help is by autosaving the content as the user moves through the list of translations. This prevents an extra button click and page reload where it is definitely not necessary. To enhance the experience even further, we will create a visual indication to let them know changes have been applied.
To do this, we’ll create a new Vue component called TranslationInput which will handle this functionality for us.
export default { props: ['initialTranslation', 'language', 'group', 'translationKey', 'route'], data: function() { return { isActive: false, hasSaved: false, hasErrored: false, isLoading: false, hasChanged: false, translation: this.initialTranslation } }, ....}Here, we are defining that the component should receive the initialTranslation, the language, the language group, the translation key and the route as properties whenever it is used. This provides all the data needed to utilize the update route we created earlier to save the translation.
The data property sets some state on the component. It is important to note that we set translation to the value of initialTranslation passed to the component as a prop.
In the component template, we bind the value of the translation property to the value of the input.
<textarea v-model="translation" v-bind:class="{ active: isActive }" v-on:focus="setActive" v-on:blur="storeTranslation"></textarea>Additionally, we set the input class to active when the isActive property of the data object is true. This is set when the input is focused and handled by the setActive method.
setActive: function() { this.isActive = true;},When the user navigates away from the input, we want to make a call to our update endpoint with the user’s changes. You can see above that we use Vue’s v-on directive to listen for the blur event, which calls the storeTranslation method. It’s in this method that we make that call.
storeTranslation: function() { this.isActive = false; this.isLoading = true; window.axios.put(`/${this.route}/${this.language}`, { language: this.language, group: this.group, key: this.translationKey, value: this.translation }).then((response) => { this.hasSaved = true; this.isLoading = false; this.hasChanged = false; }).catch((error) => { this.hasErrored = true; this.isLoading = false; })}Here, we use axios, an HTTP client for JavaScript, to make a call to our update endpoint. We use all the props passed in to the component to generate the URL and the latest translation made by the user which we wish to save.
We update the state of the component in accordance with the result of the call and give the user a visual indication of whether or not their action was successful. We do this by rendering an appropriate SVG icon.
<svg v-show="!isActive && isLoading">...</svg> // default state, pencil icon<svg v-show="!isActive && hasSaved">...</svg> // success state, green check icon<svg v-show="!isActive && hasErrored">...</svg> // error state, red cross icon<svg v-show="!isActive && !hasSaved && !hasErrored && !isLoading">...</svg> // saving state, disk icon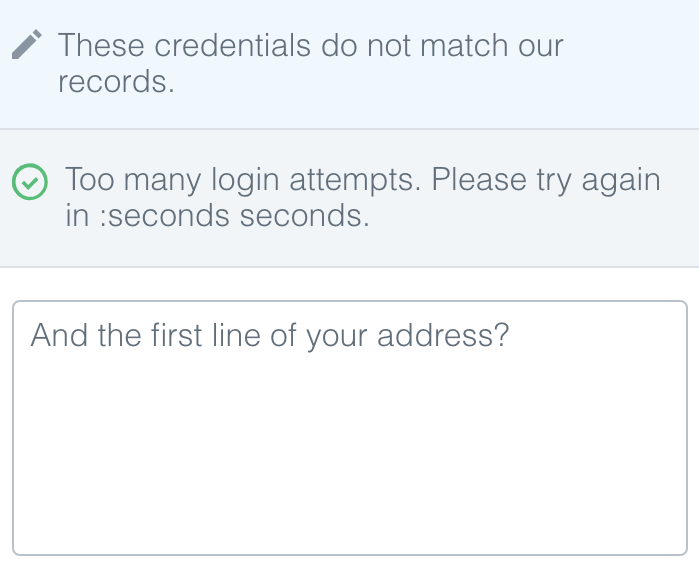
In this article, we’ve had a tour of the most important components of the frontend build. We have made an interface that not only looks nice but also functions well for our users.
In the next part of the series, we will build out the ability to scan a project for translations which may be missing from the language files. In the meantime, if you have any questions, please feel free to reach out on Twitter.